
User roles and collaboration
You can invite classmates, colleagues or committee members to help build your yearbook. Some people help shape the whole book, while others only need to fill in their own page. This guide shows you how to get into your account, bring the right people on board, change someone's role and understand who can do what.
Getting started as a main editor
If you've been set up as a main editor, we'll email you your login details.
- Log in at yearbook.com using your email address and the details you were sent.
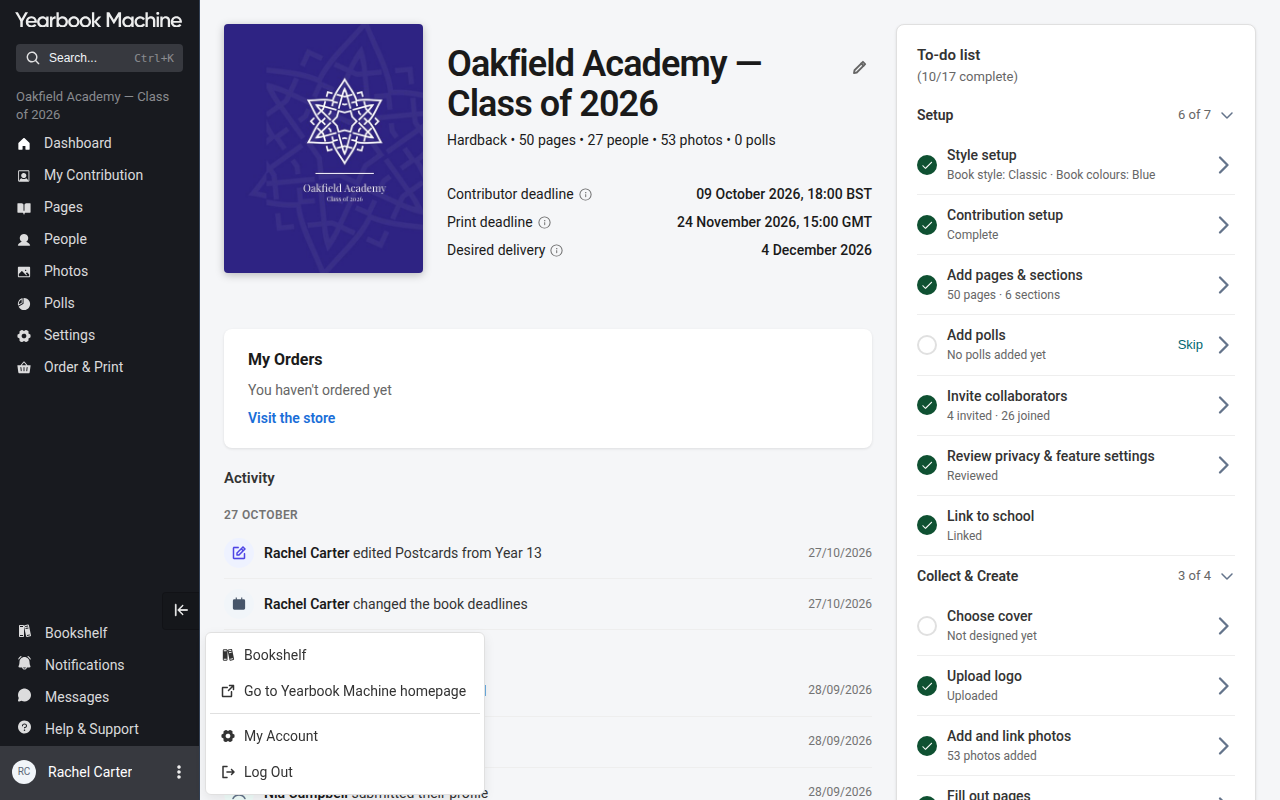
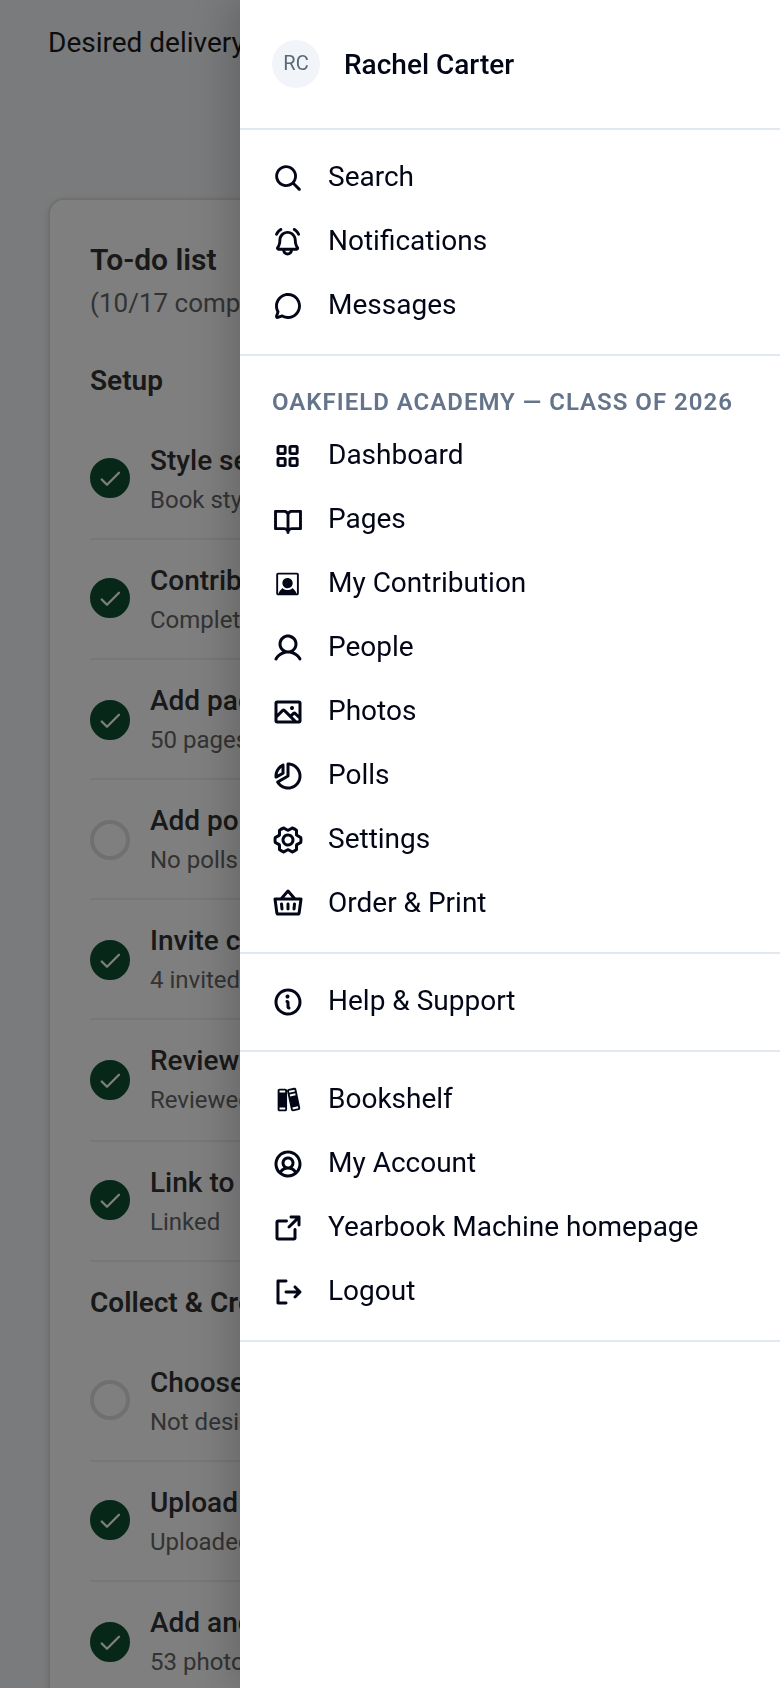
- Click your name at the bottom of the main menu. On a phone, open the menu button at the top right: your name is at the top of the menu.
- Choose My Account.
- Change your password to one you'll remember.
Once you're in, a good order of work is:
- Invite anyone who'll help you run the book as an editor.
- Plan your other pages, such as group photos or memories, so you know how much of your page allowance they'll use.
- Invite everyone featured in the book as a contributor.
- Choose your cover design, colour, finish and text.
If you're starting a brand new yearbook rather than joining one that's been set up for you, sign up at https://yearbook.com/signup. You can get a guide price at https://yearbook.com/pricing.
Choosing the right role for each person
When you invite someone, think about how much of the book they need to work on:
- Editor: for people helping you run the yearbook. Editors can change anything on any page, decide whether people can view or comment on other profiles, choose which photos go into the book and send it to print. Invite people you'd trust to help manage the whole book.
- Contributor: for everyone featured in the book. Contributors get their own profile page when they sign up, unless they untick Create a profile page for me in this yearbook. They can add photos and vote in polls, but they can't edit the rest of the book or send it to print.
You don't need to create profile pages yourself. Each contributor's page is set up for them when they join, if they choose to have one.
Inviting people to help edit the book
Each editor needs their own account, so you and your co-editors can work on the book together from separate logins.
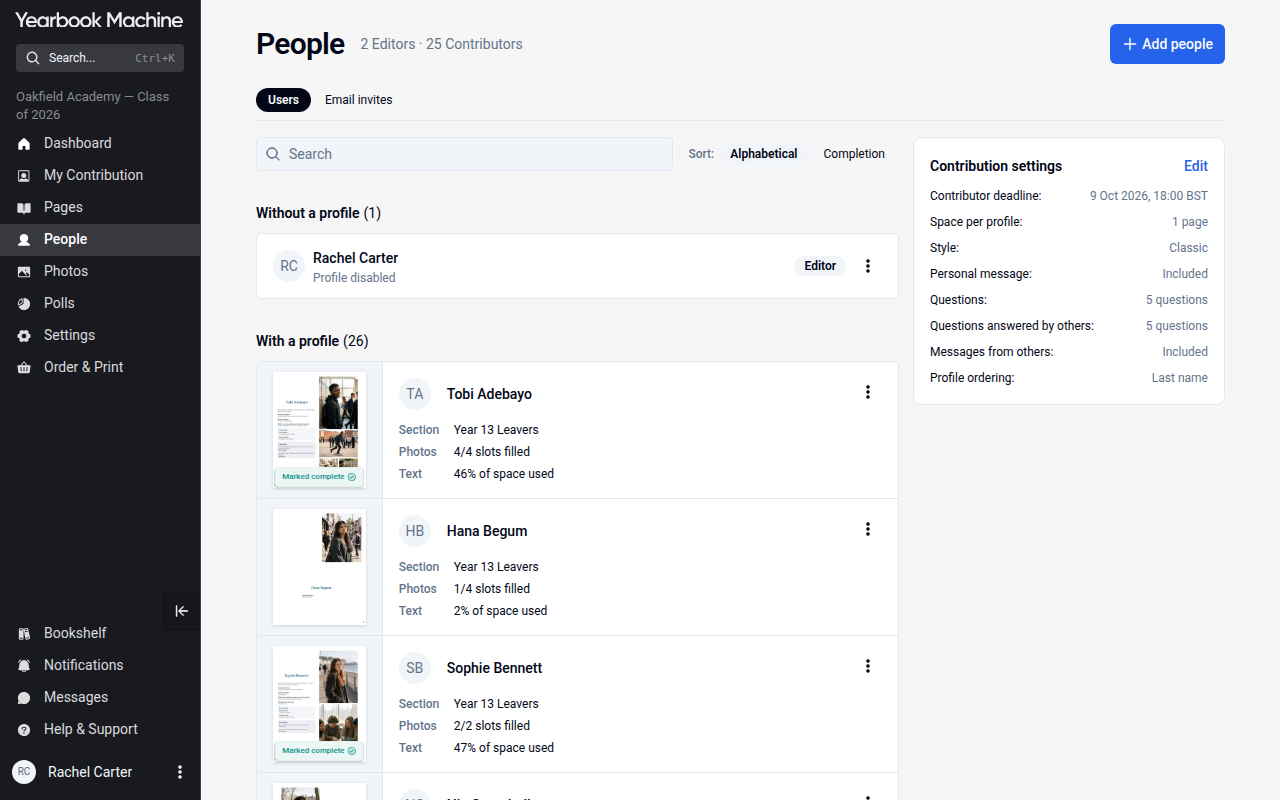
- Go to People in the menu.
- Click Add people. If you're asked to set up contributions first, do that or choose Use standard setup.
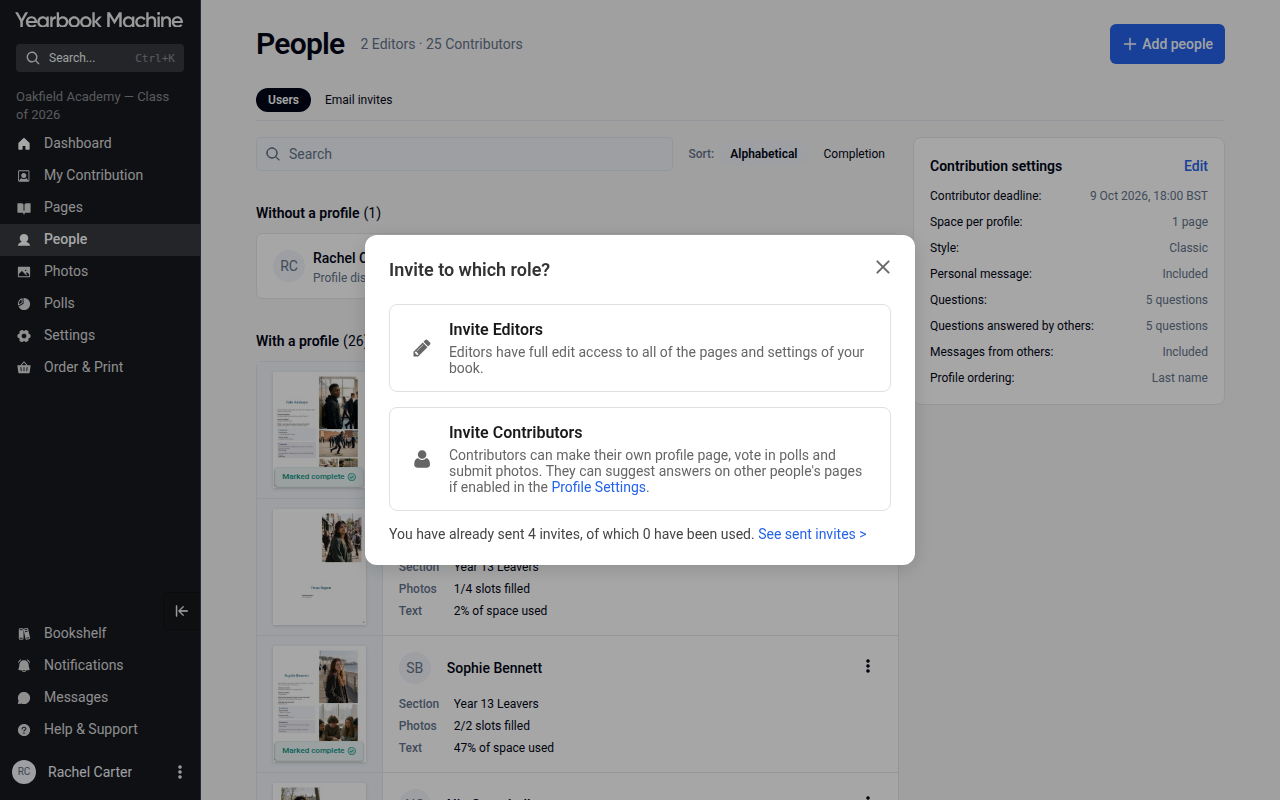
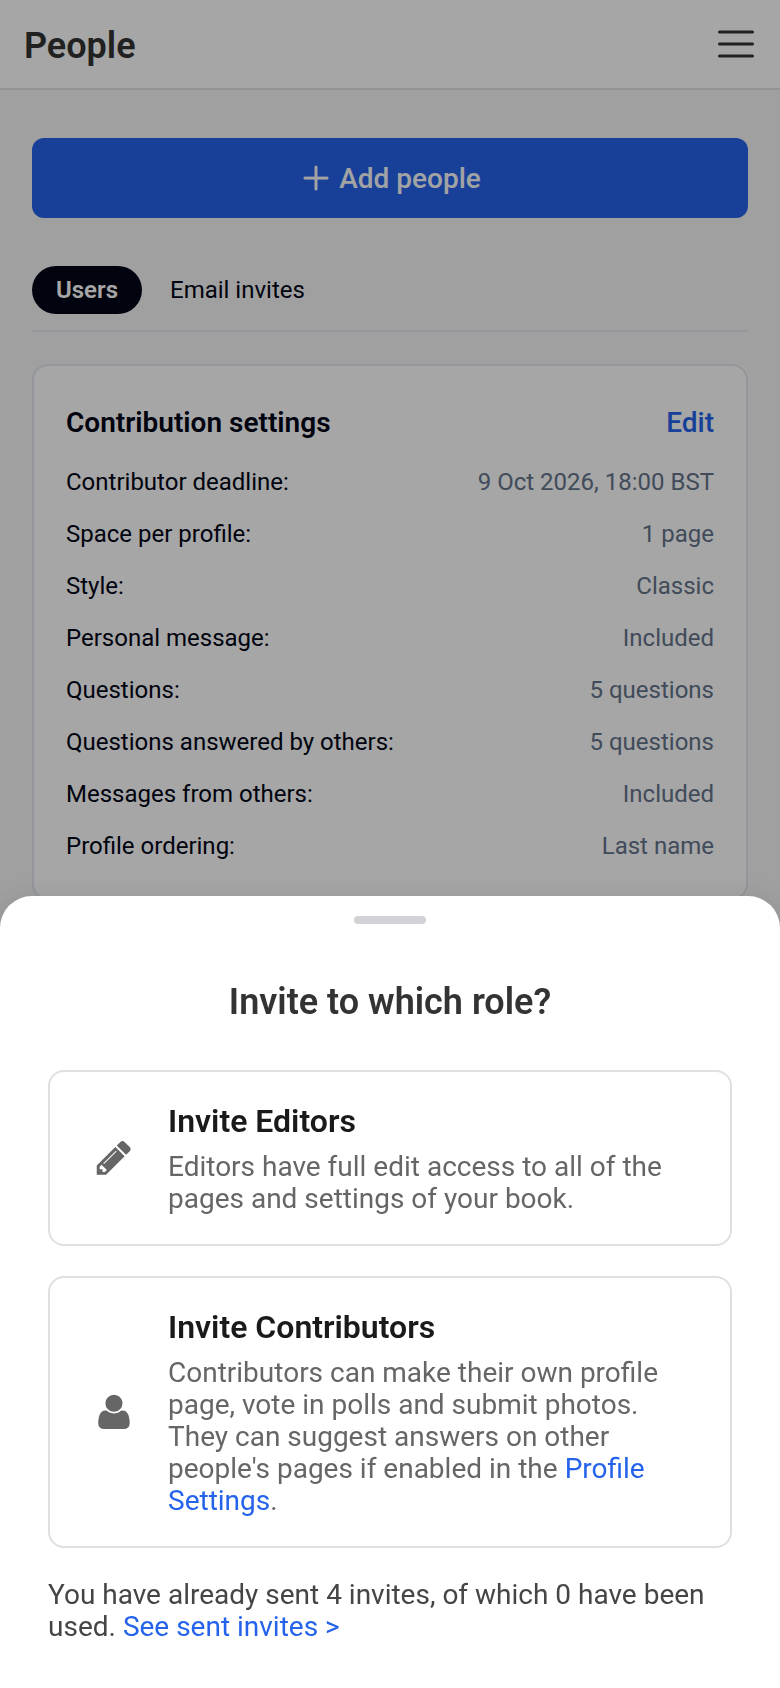
- Choose Invite Editors.
- Your co-editor accepts the invitation and can then work on the book with you.
Inviting people to fill in their own pages
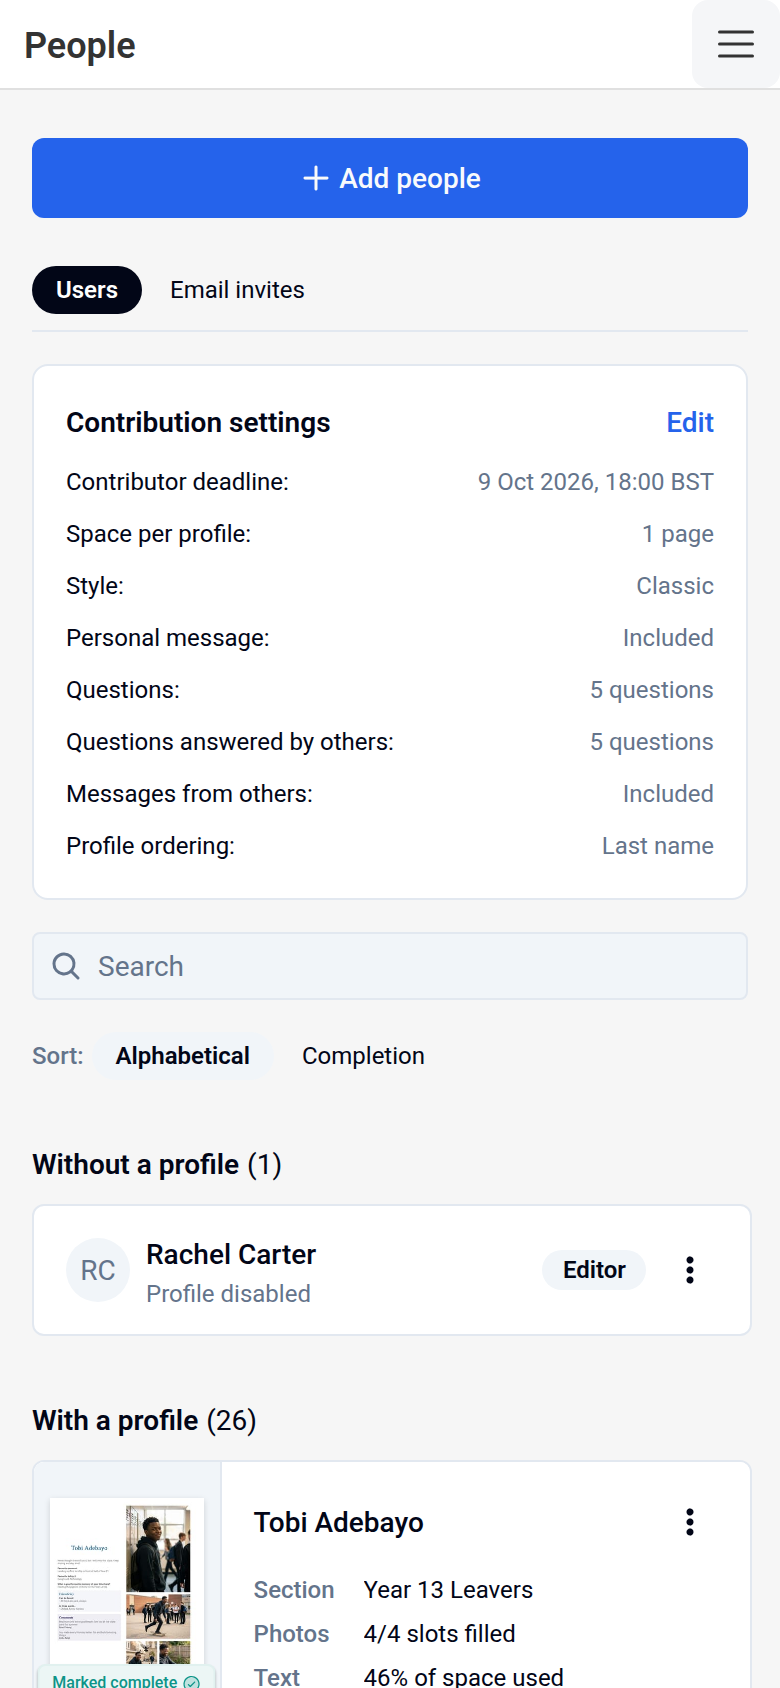
- Go to People in the menu.
- Click Add people.
- Choose Invite Contributors.
If people see a "too many signup attempts" message
If lots of people try to create their accounts at the same time from the same place, for example a whole class signing up on the same school or university Wi-Fi, some of them may see a too many signup attempts message and be unable to join.
If this happens, get in touch with us and let us know. We can sort it out so everyone can finish signing up.
Making an existing contributor an editor
If someone has already joined as a contributor and you'd like them to help run the book, you can change their role:
- Go to People.
- Open the three-dot menu on the person's card.
- Choose Make editor and confirm.
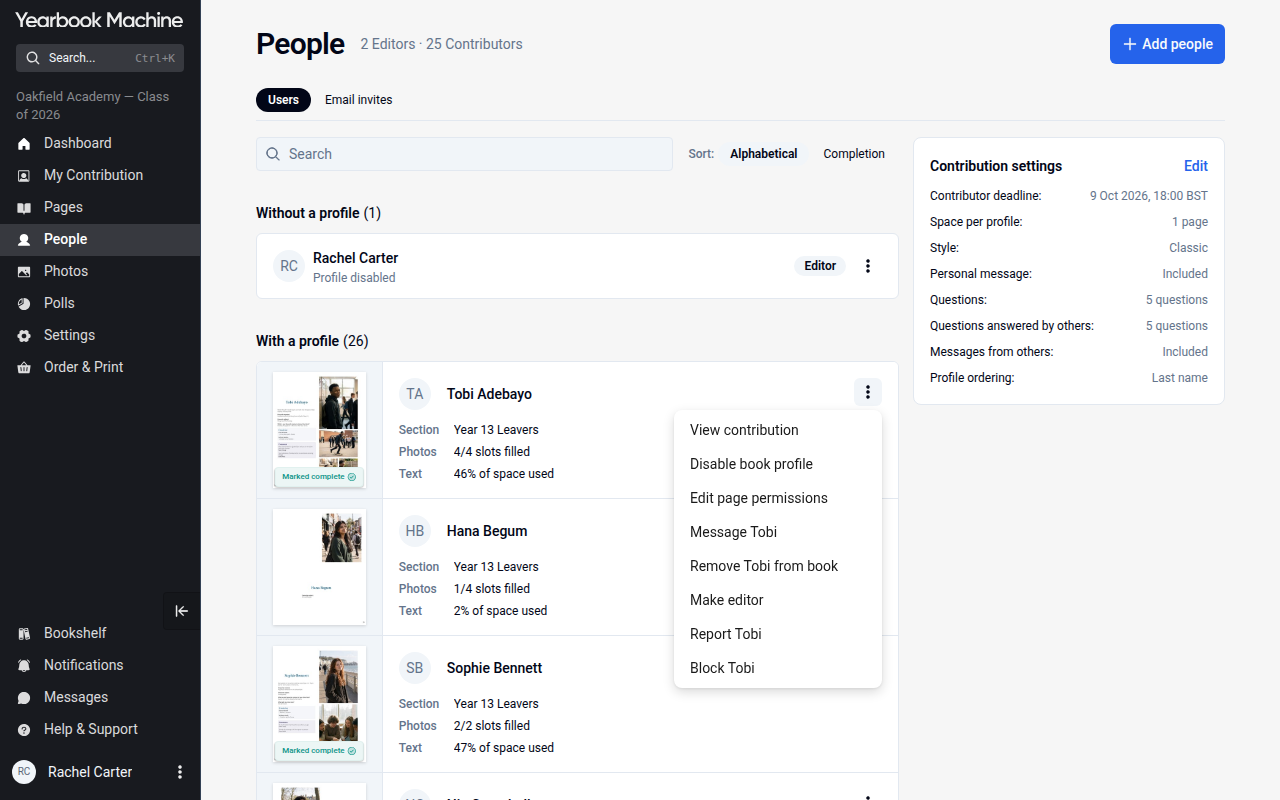
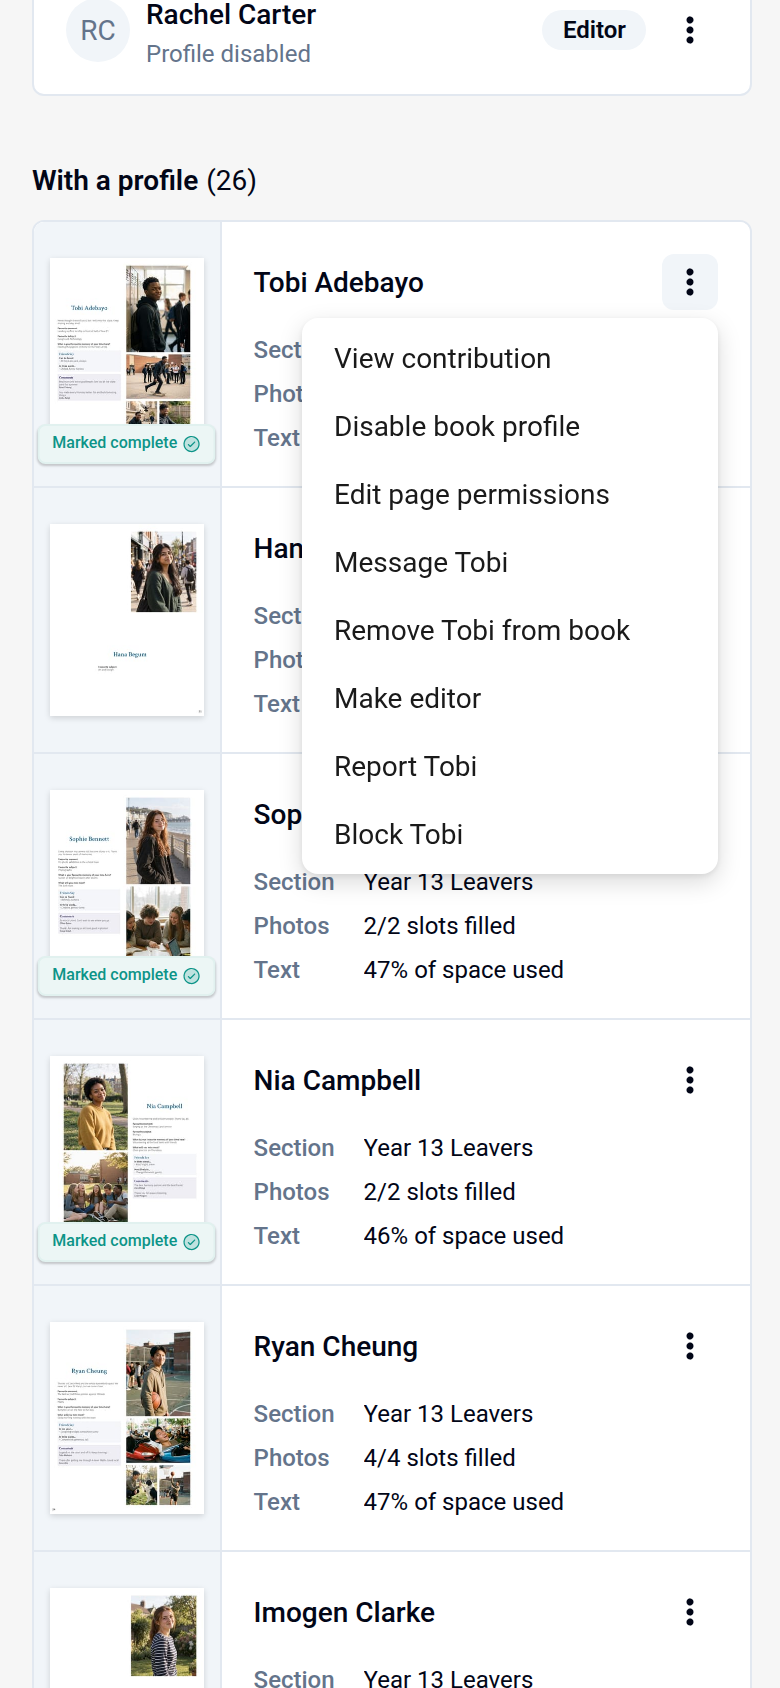
Edit page permissions, in the same menu, controls who can edit that person's page; it doesn't change their role. If you can't see Make editor, or you'd rather we did it for you, just get in touch and tell us the person's name. We'll update their role for you.
Choosing which contributor photos go in the book (editors)
You stay in control of which photos are printed. When contributors upload photos to a shared page, such as a group photos or memories page, those photos are linked to the page but not placed on it. They only appear in the book once an editor places them on the page.
- Ask contributors to upload and link their photos to the right page.
- Open that page as an editor and click the Photos tab on the right. It shows Photos linked to this page. On a phone, the tabs are in the panel under the page.
- Drag the photos you're happy with onto the page.
- Leave any photos you don't want unplaced. Photos you don't place aren't printed.
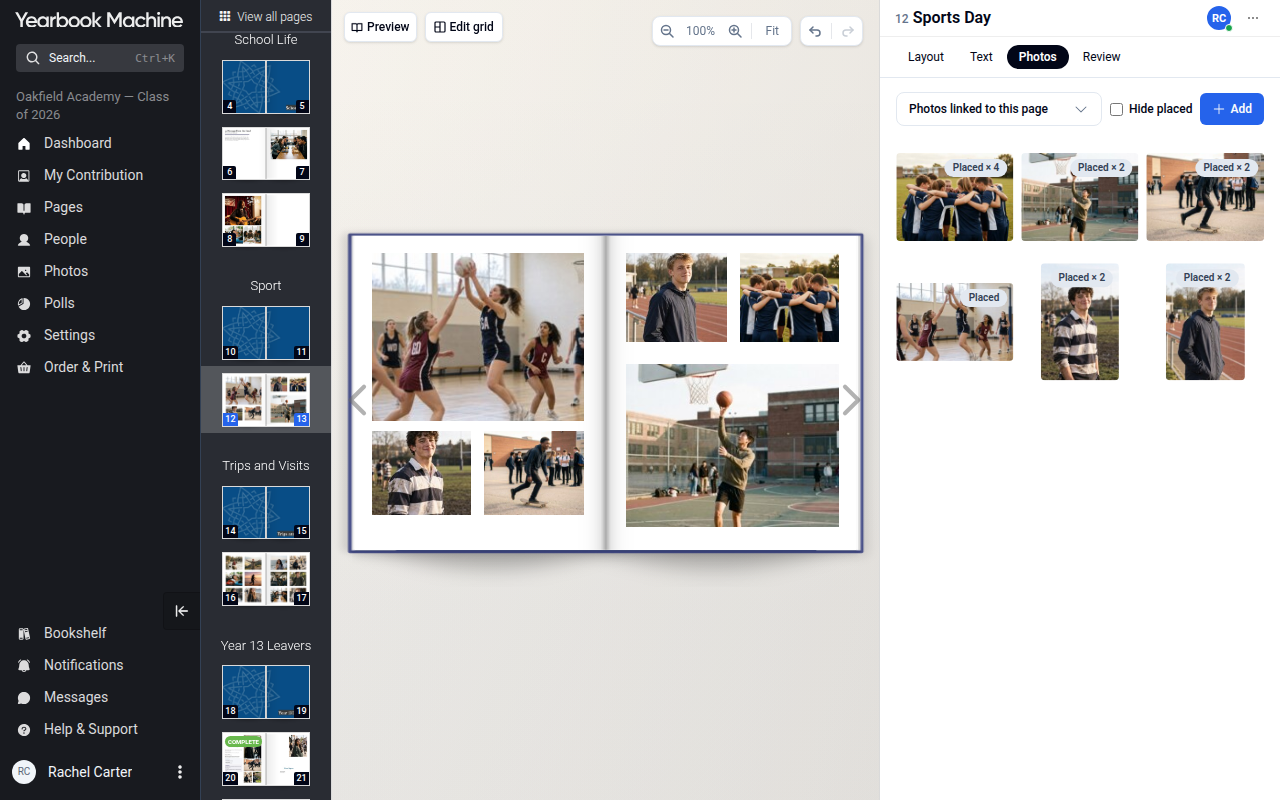
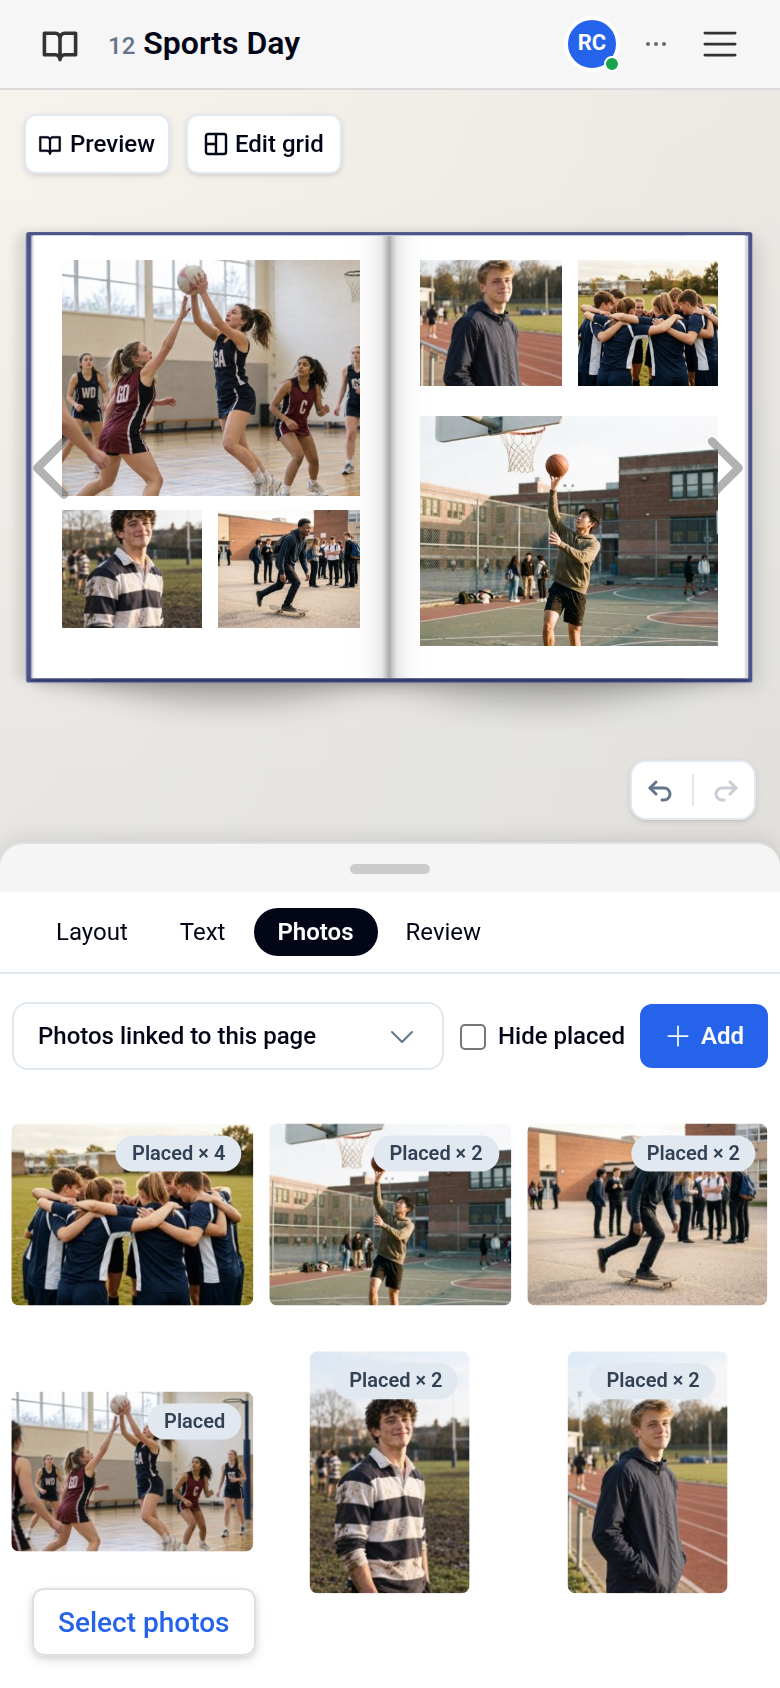
Photos that contributors add to their own profile pages go straight onto those pages.
Who can see and comment on profiles
Whether people can view or comment on other people's profiles is decided for the whole book by its editors, so contributors can't change it for their own page. Editors can change who sees each part of a profile in Settings > Contributor permissions. Set each section to Can view or Hidden. If you're a contributor and would like this changed, ask the editor(s) of your yearbook.
Finishing your page as a contributor
If you've been invited as a contributor, your job is to fill in your own profile page. When you're happy with it, let your editors know it's done:
- Click the three dots at the top right of your screen and select Mark as complete. This opens the Review tab.
- Click Mark as complete on the Review tab.
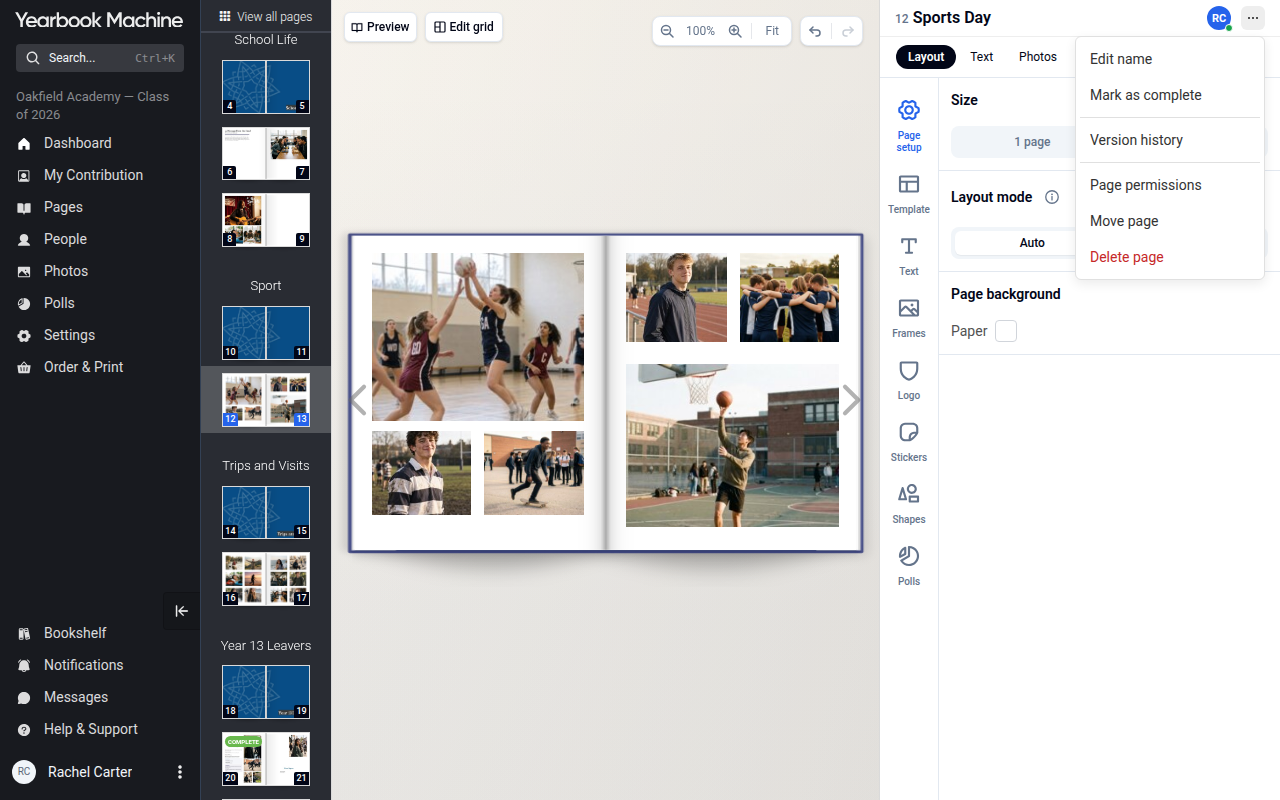
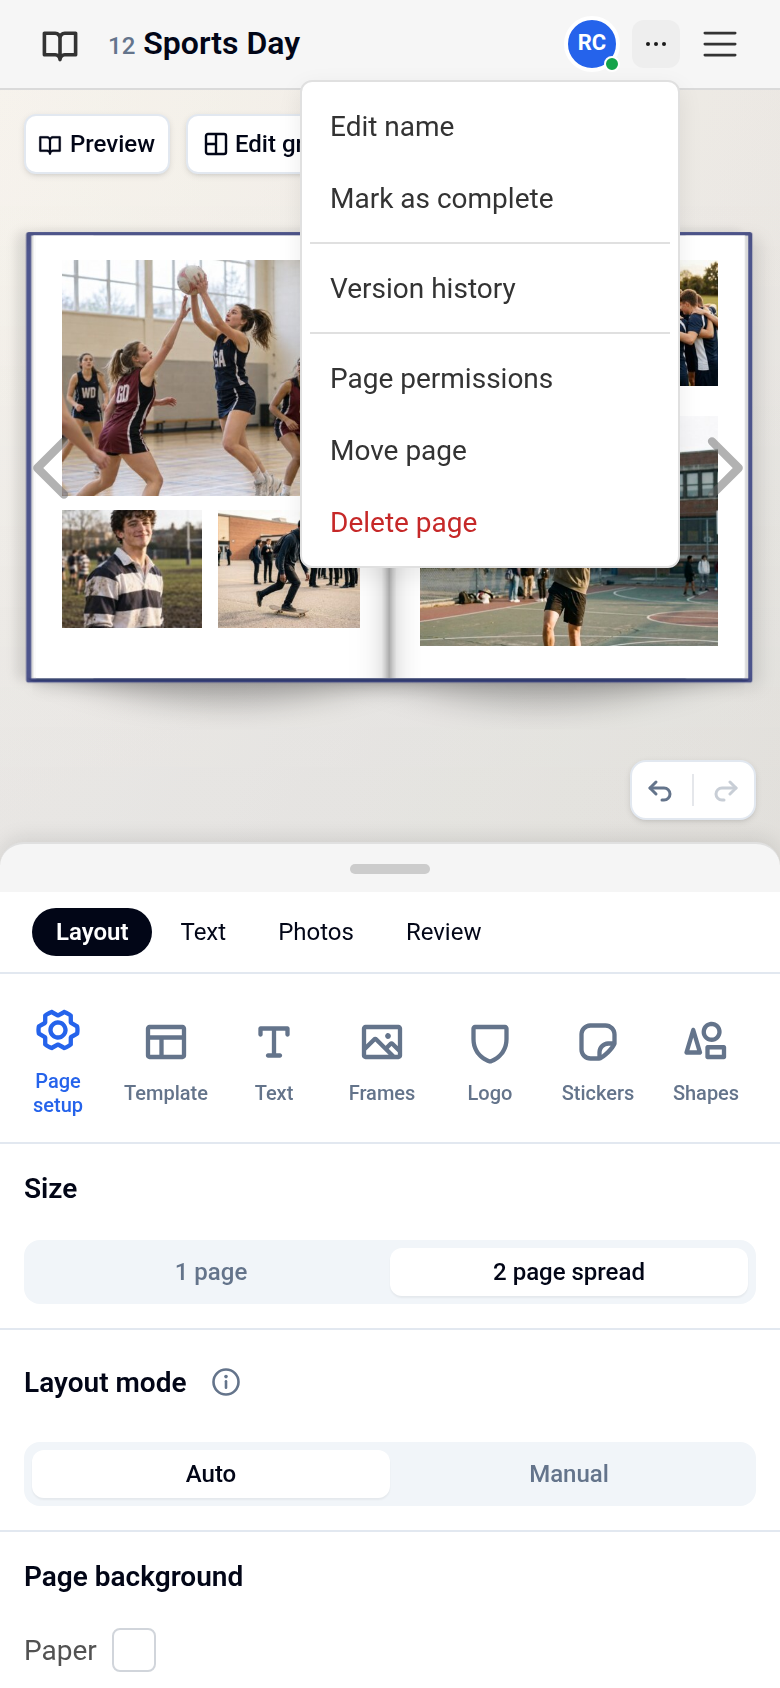
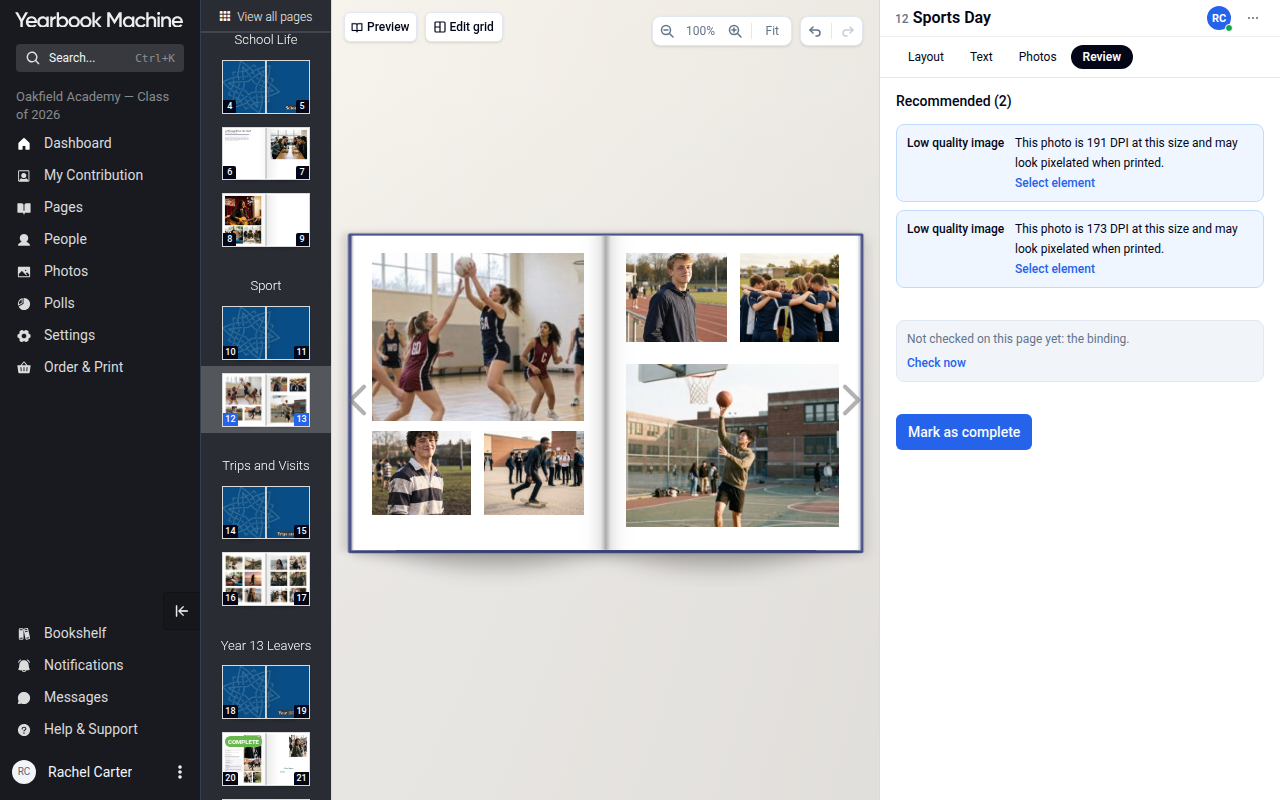
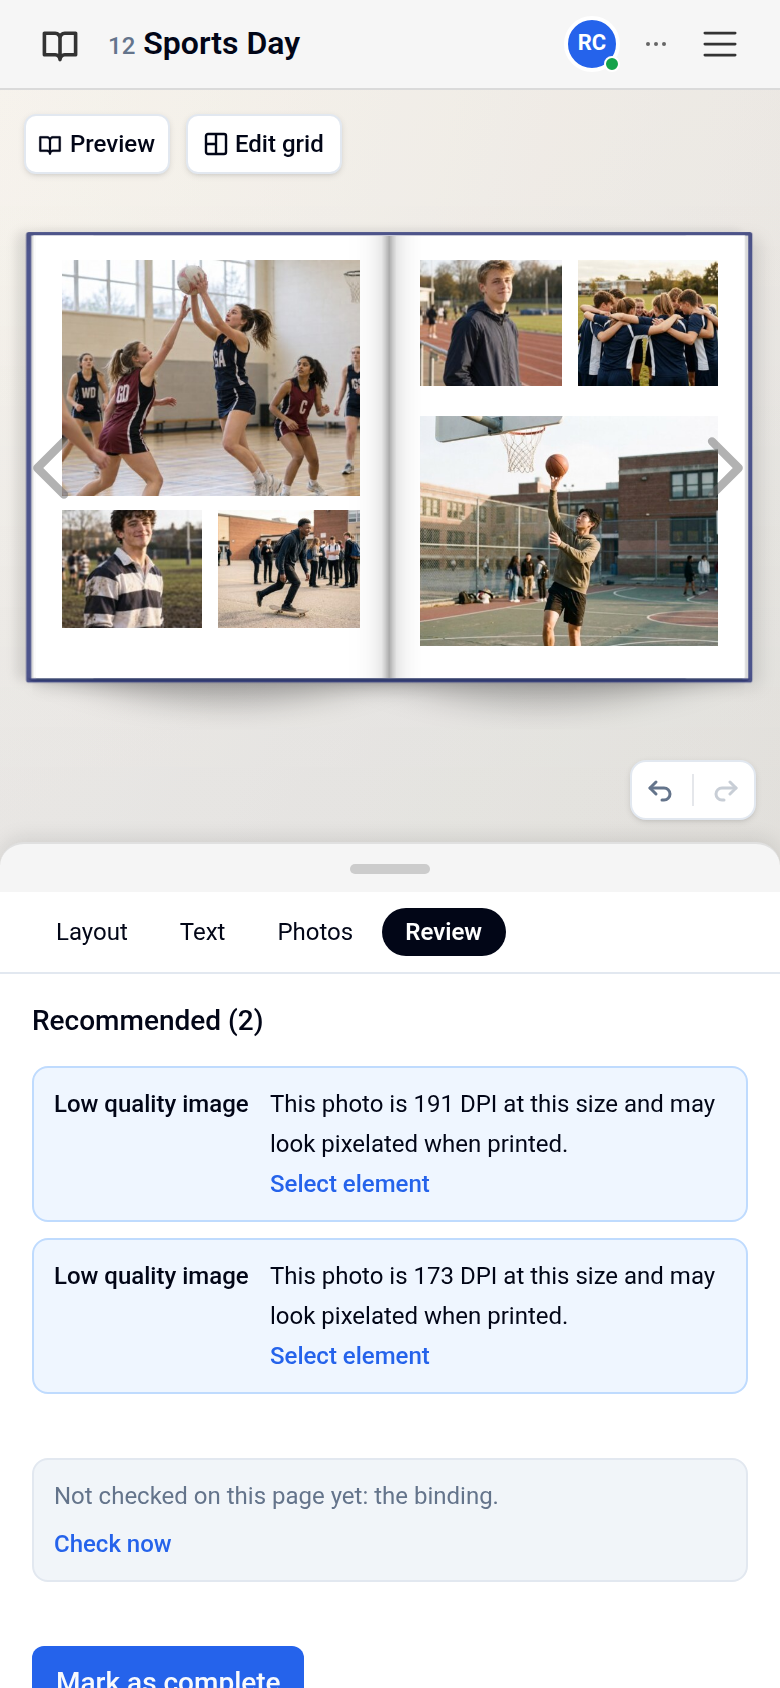
Contributors can't send the yearbook to print. Once everyone's pages are ready, one of your editors will place the order. If you're not sure whether you're an editor or a contributor, ask your main editor.
If you've missed your contribution deadline
Your editors set the deadline for contributors, so they're the people who can give you more time.
- Contact your yearbook editor and ask for an extension.
- Once they've updated the deadline, log back in and carry on with your page.
- If you still see a missed deadline message after your editor has given you more time, get in touch with us and we'll clear it for you.
Checking and ordering the book (editors only)
Editors can keep working on the book right up to its print deadline, which you'll find on the Overview tab of Order & Print › Yearbooks, and on your Dashboard. If that date has passed and you need more time, choose a later delivery date on the same tab.
To check how your book will look in print:
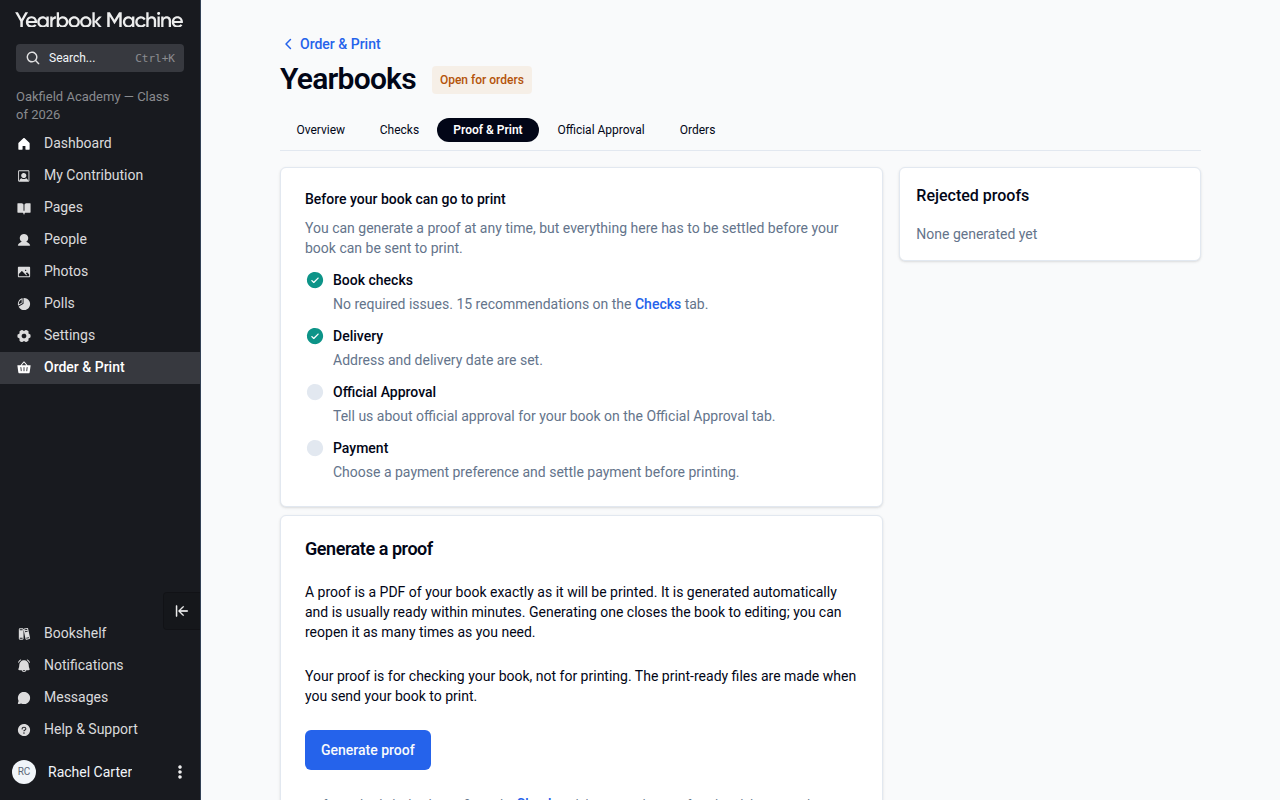
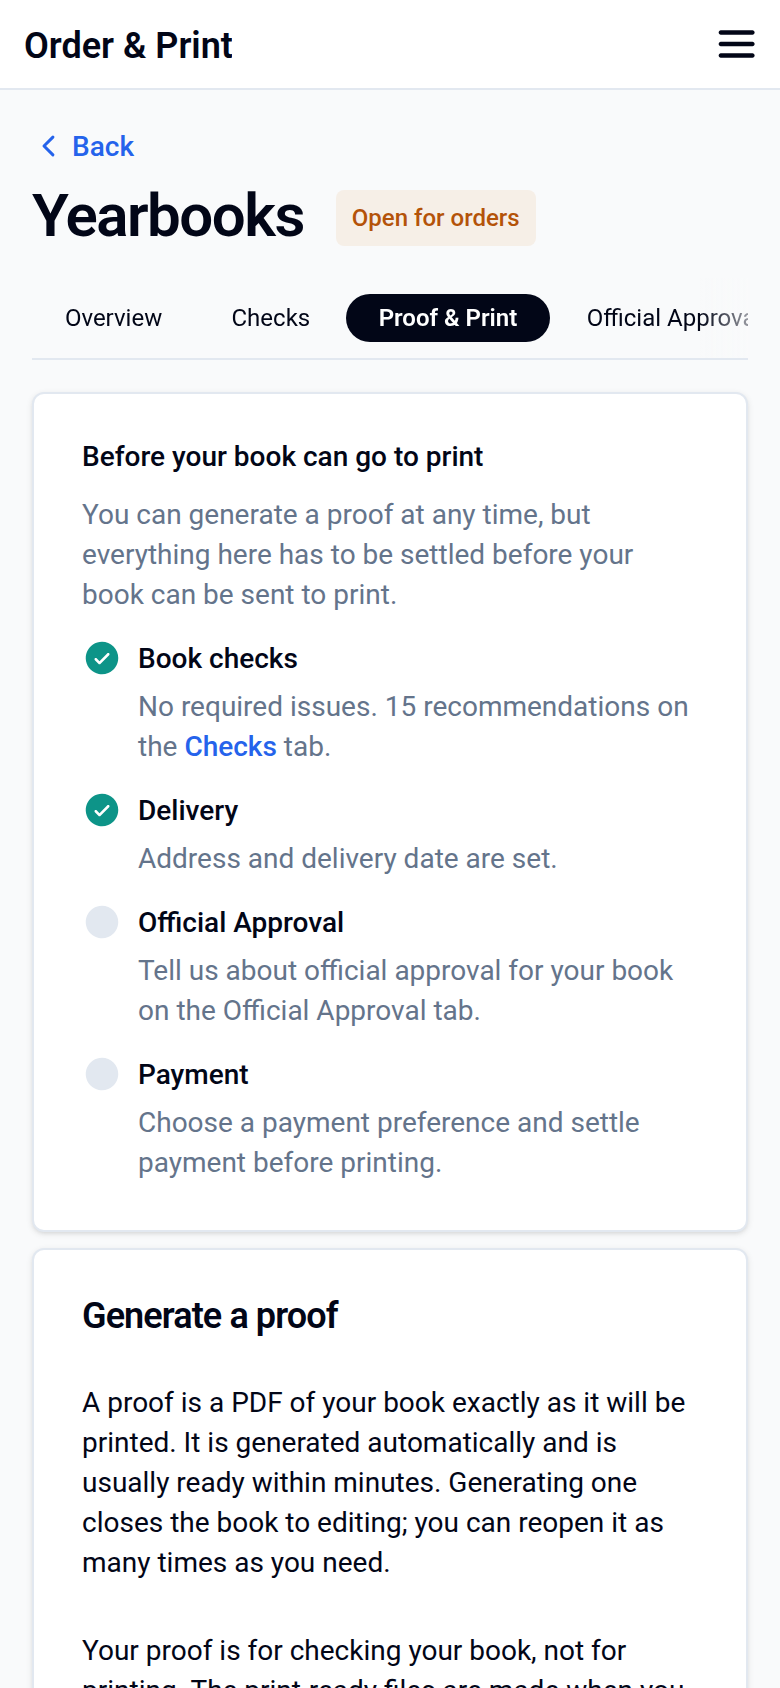
- Go to Order & Print, click Yearbooks and open the Proof & Print tab.
- Click Generate proof. Your proof is usually ready within minutes.
- If you spot something to change, reopen the book for changes on the same tab, edit the book, then generate a new proof.
To place your order:
- Go to Order & Print.
- Select Yearbooks.
- Go through the Ordering setup.
If you'd like each person to pay for their own copy by card, your storefront is created when you finish setting up Order & Print.
Checking your print deadline: if the deadline shown on your Dashboard ever doesn't match the date in Order & Print, go by the date in Order & Print and let us know so we can check it for you.
Starting next year's book
You can start a new yearbook from your existing account, so there's no need to sign up again:
- Log in at yearbook.com with your usual details. You arrive on your Bookshelf.
- Click Create a book.
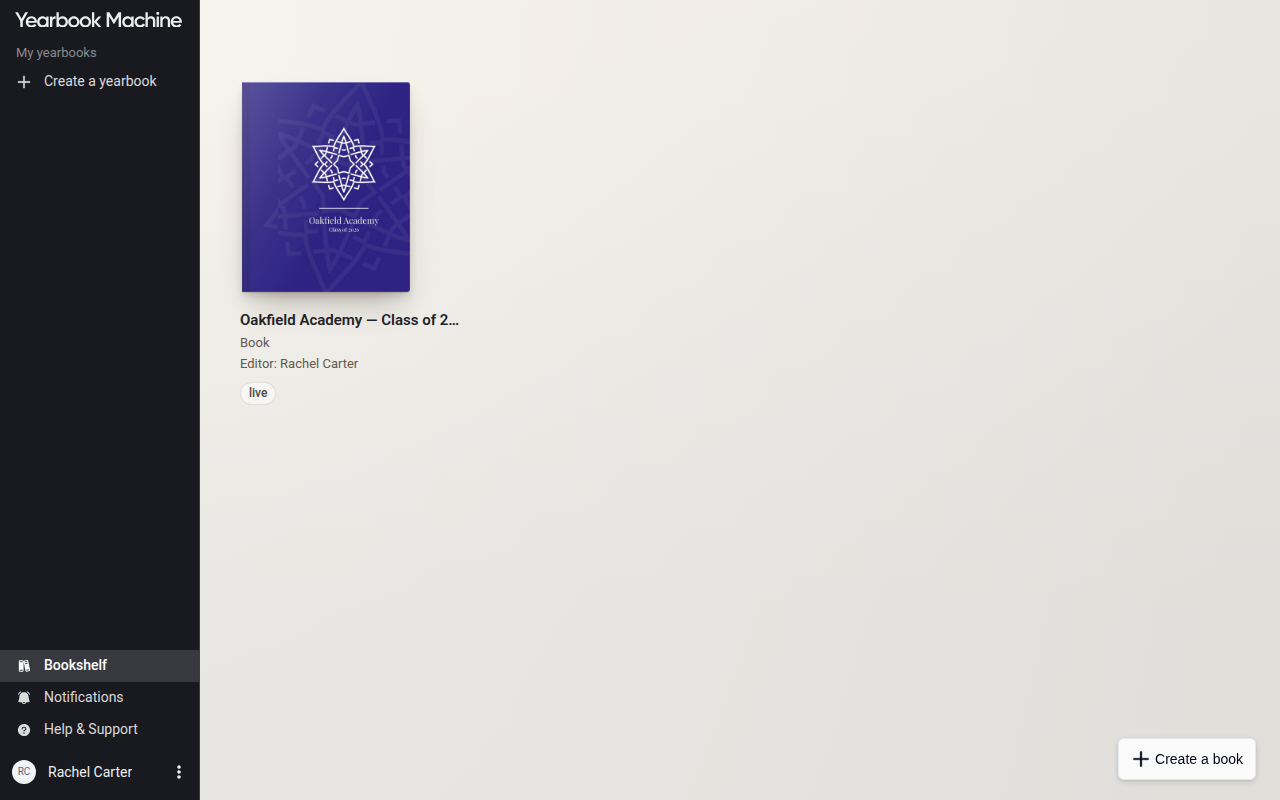
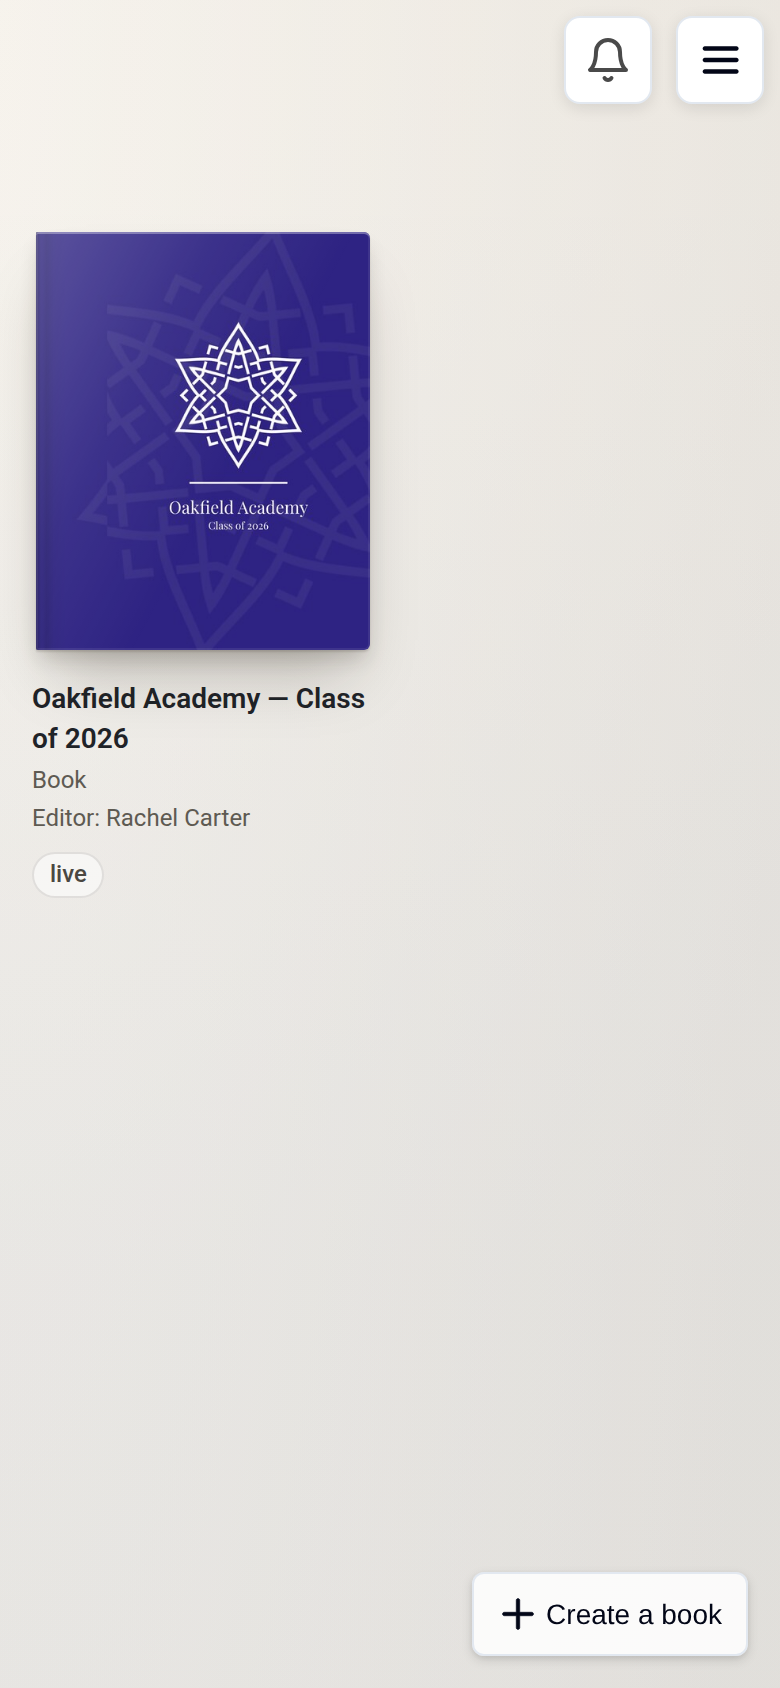
If you'd like your new book to use last year's page layouts, titles and headteacher pages, create the new book first and then let us know. We'll set it up to match.
To rename a book, open its Dashboard and click the pencil beside the book's name.
If you can no longer get into the email address on your old account, you can create a new account and tell us, and we'll help you get set up.
Getting extra copies or a PDF of a past yearbook
If you'd like more printed copies of a yearbook you've already ordered, small reprints and even single copies are possible. There usually isn't a minimum: we check each request with our printer and confirm it with you.
If you'd prefer a digital copy, we can send you a PDF of the book. Because the book belongs to its editors, we need their written permission first:
- Contact the editor of your yearbook.
- Ask them to email us directly saying they're happy for the PDF to be shared with you.
- Once we've received their email, we'll send you the PDF.
Qualifying for a Dental Protection sponsored yearbook
If your yearbook is sponsored by Dental Protection, each student qualifies for the book by renewing their membership:
- Create your profile account on the yearbook site.
- Complete your Dental Protection membership renewal using the renewal link you've been given.
- Provide your bank details and set up a Direct Debit for your FD year as part of that renewal.
- Complete your profile details before your year group's submission deadline.
Profiles sent in after the deadline can only be included if there's still room, so we can't guarantee a place for late submissions.
A Dental Protection contact is also added as an editor on sponsored books, so they can help your team and check content along the way.
If another organisation sponsors your yearbook, get in touch before your deadline and we'll tell you what you need to do to qualify.
Was this article helpful?
Sorry, that didn't send. Please try again in a little while.
Thanks. That helps us improve this article.
Any other questions?
Email support@yearbook.com and we'll help you out.