
Managing your account, membership and privacy
Keeping your profile and membership up to date means you'll get your yearbook. This page explains how to qualify for a sponsored copy, set up your account and team, keep unfinished pages private, and choose which emails you receive.
Qualifying for a Dental Protection sponsored yearbook
If Dental Protection sponsors your yearbook, here's how to qualify for your copy:
- Create your profile on the yearbook platform.
- Complete your Dental Protection membership renewal application.
- Give your bank details and set up a Direct Debit for the £10 renewal fee.
Try to complete your profile early so you don't miss any submission deadlines.
Not going straight into practice? You can still qualify if you won't start work as soon as you graduate. This includes Dental Therapy students who aren't doing a foundation year. Contact our support team and we'll pause your membership until you start work. You'll keep your place for the yearbook.
If another organisation sponsors your yearbook, contact our support team before you renew and we'll tell you what to do.
Getting set up as a yearbook representative
If you're your group's representative, we'll email you your login details. To get started:
- Log in at yearbook.com with the details we sent you.
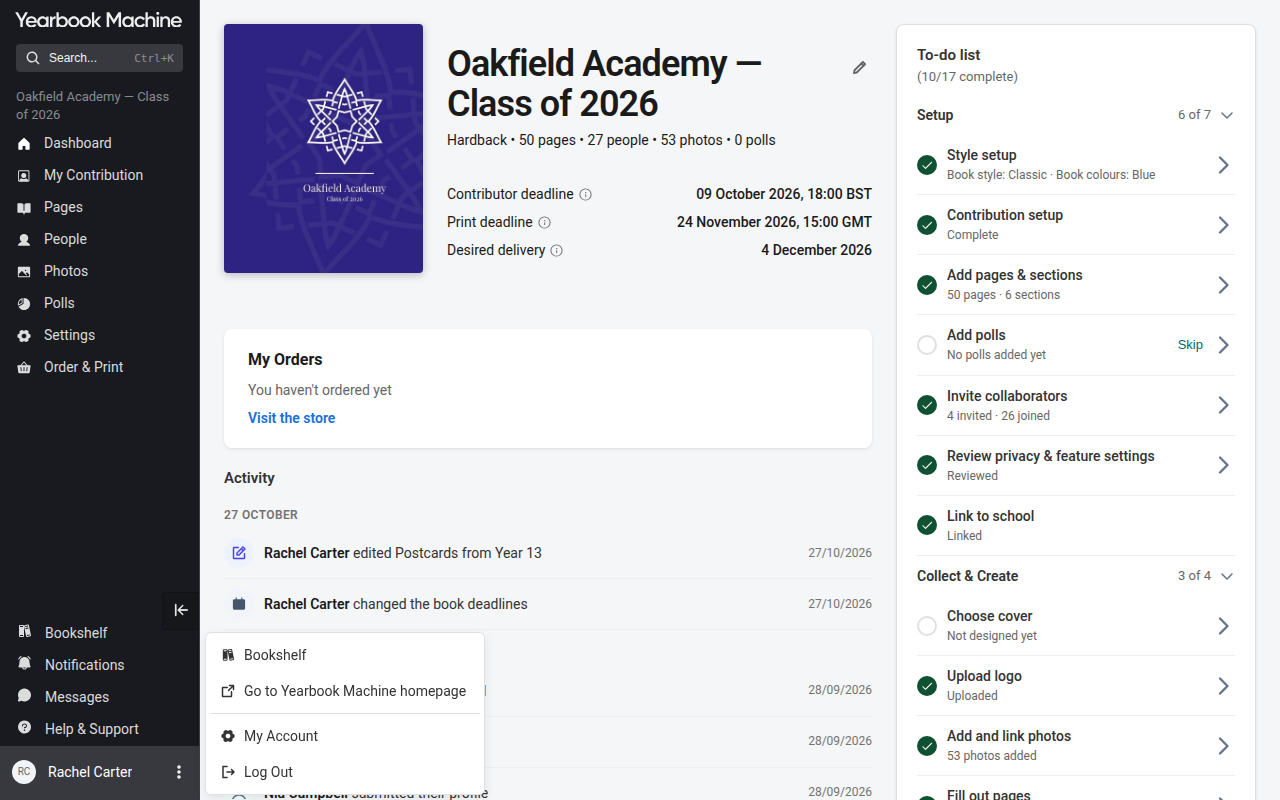
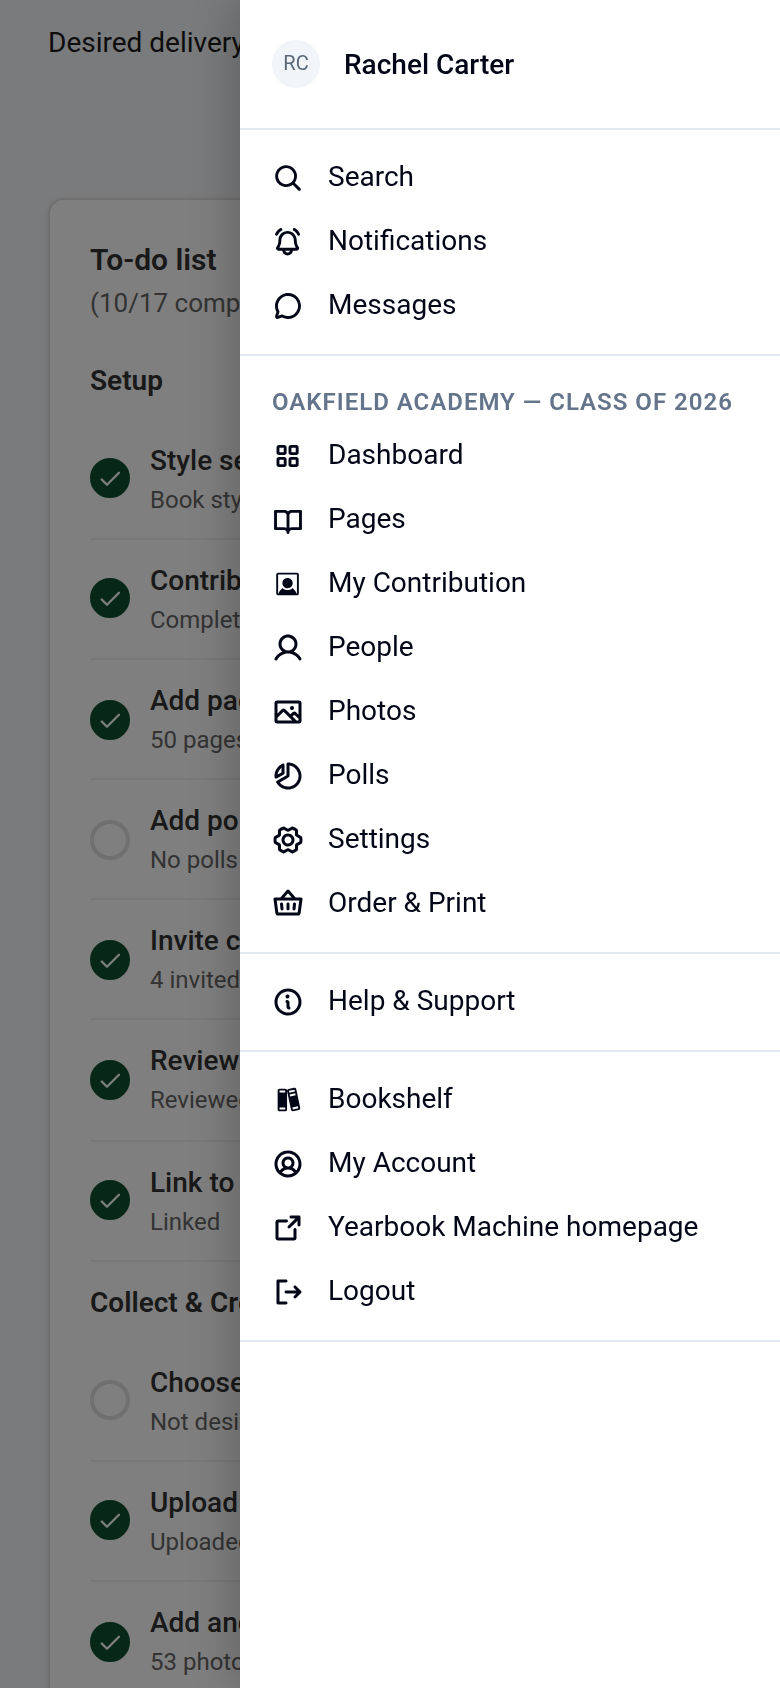
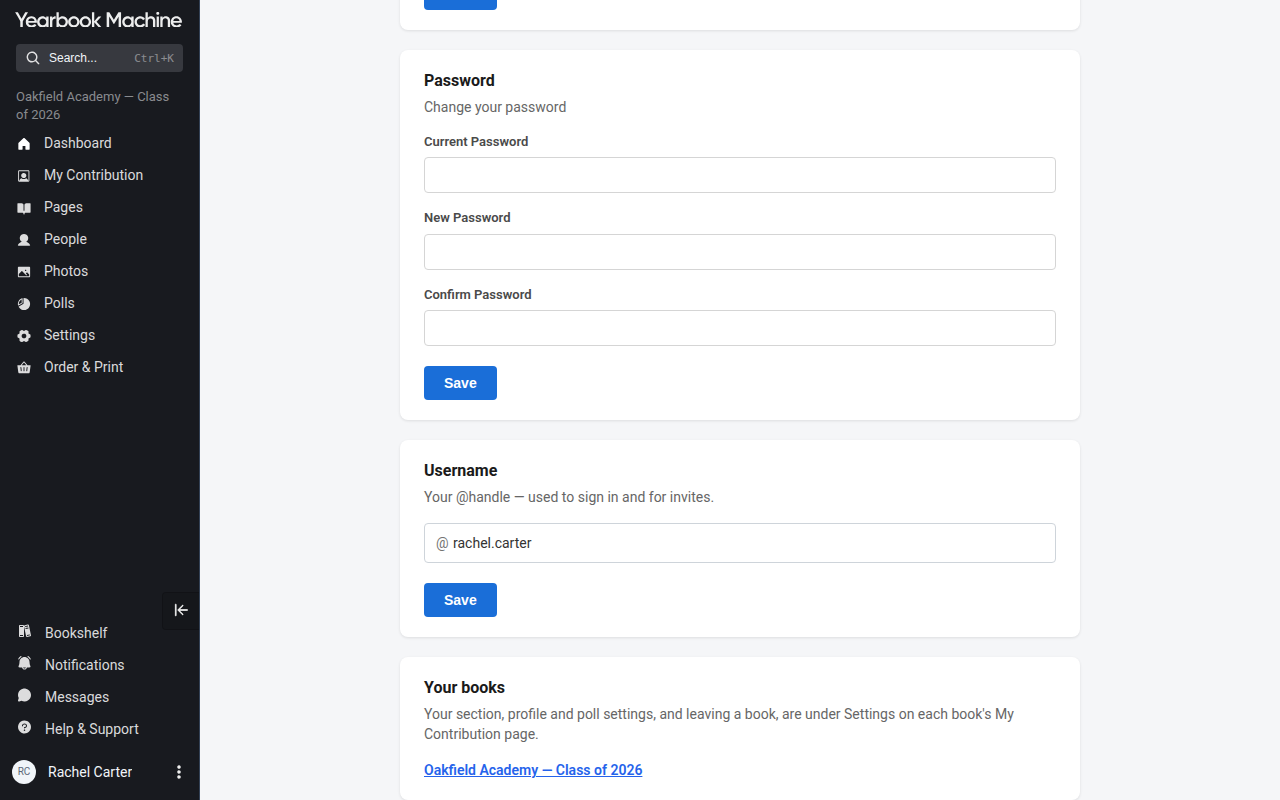
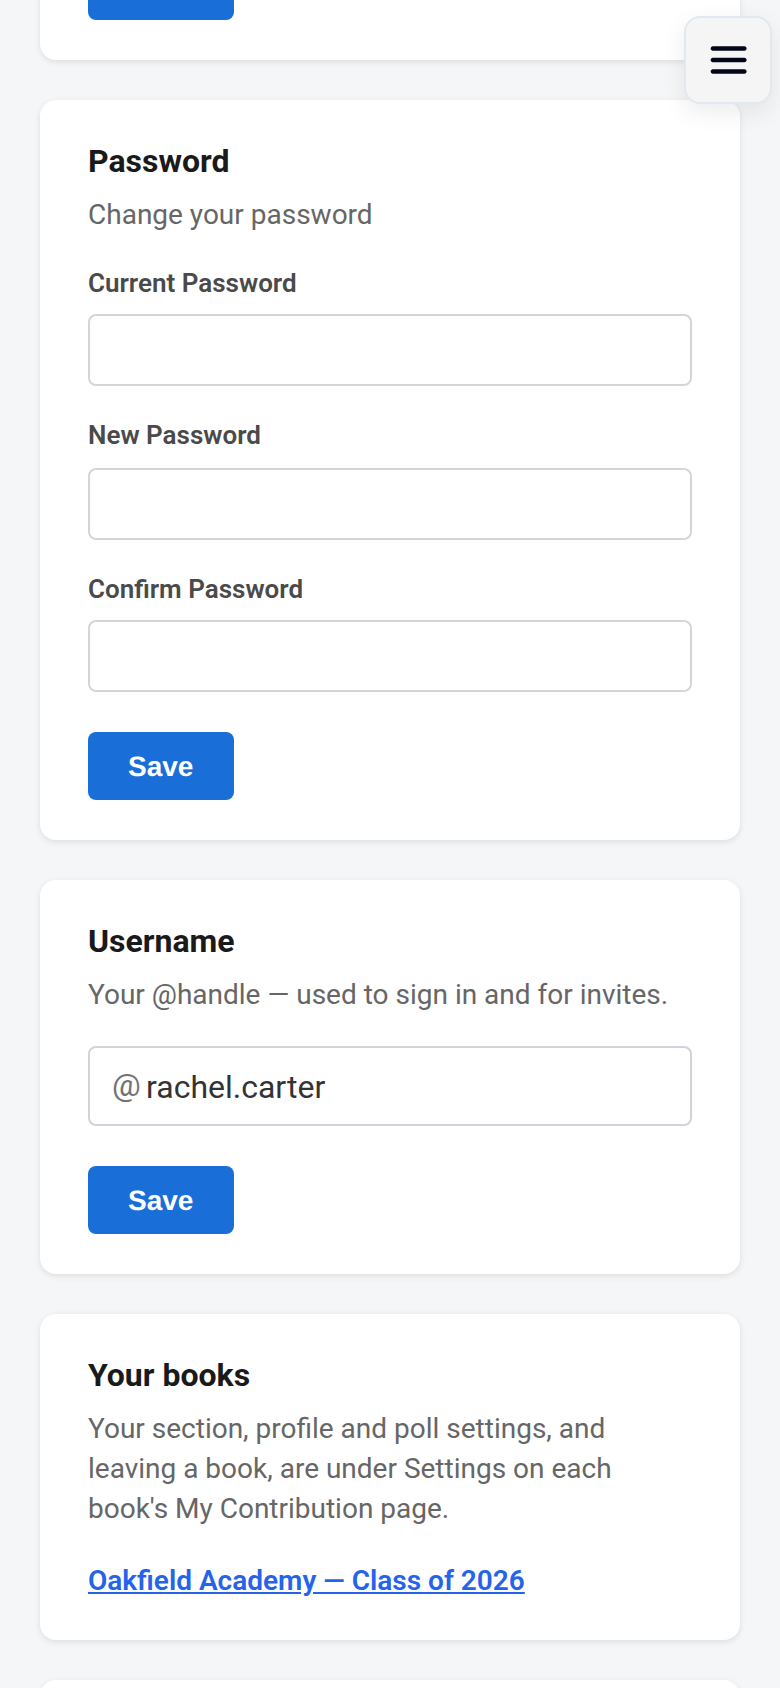
- Change your password straight away. Click your name at the bottom of the main menu and choose My Account. On a phone, open the menu button at the top right: your name is at the top of the menu.
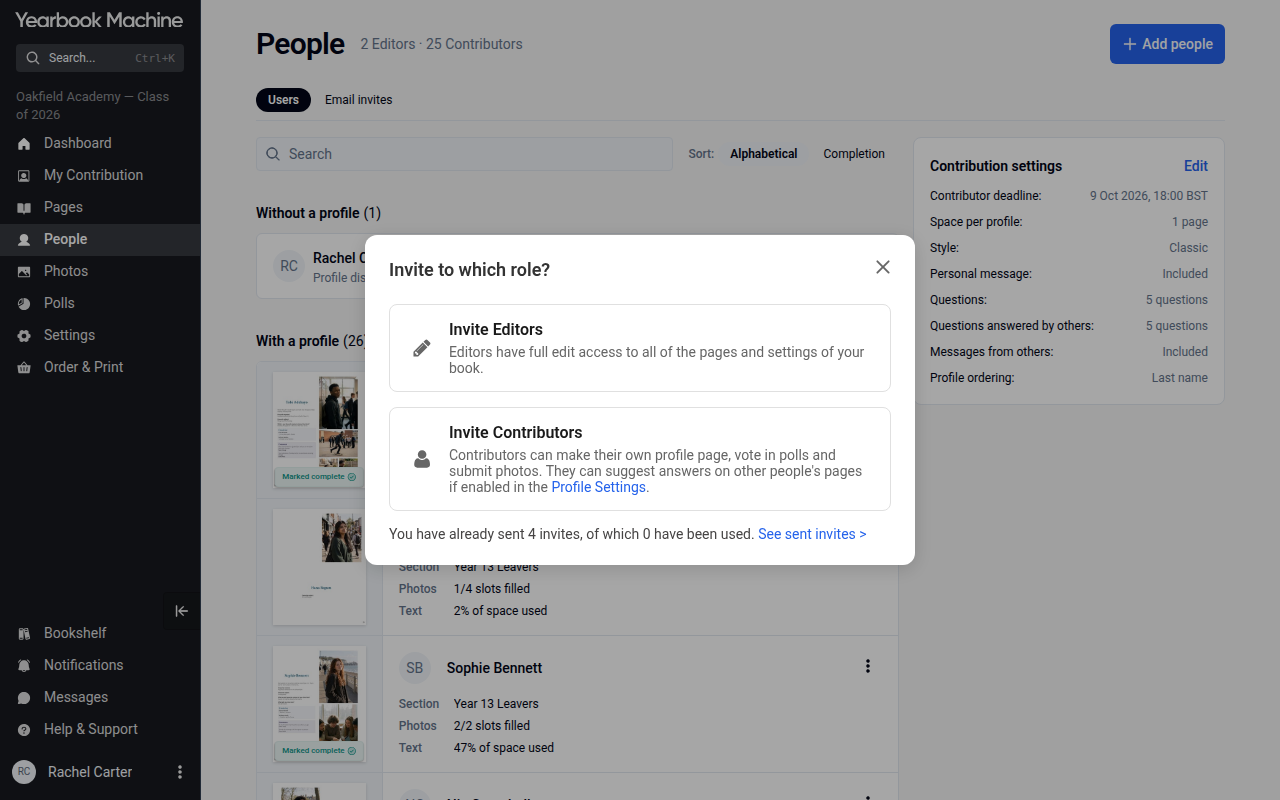
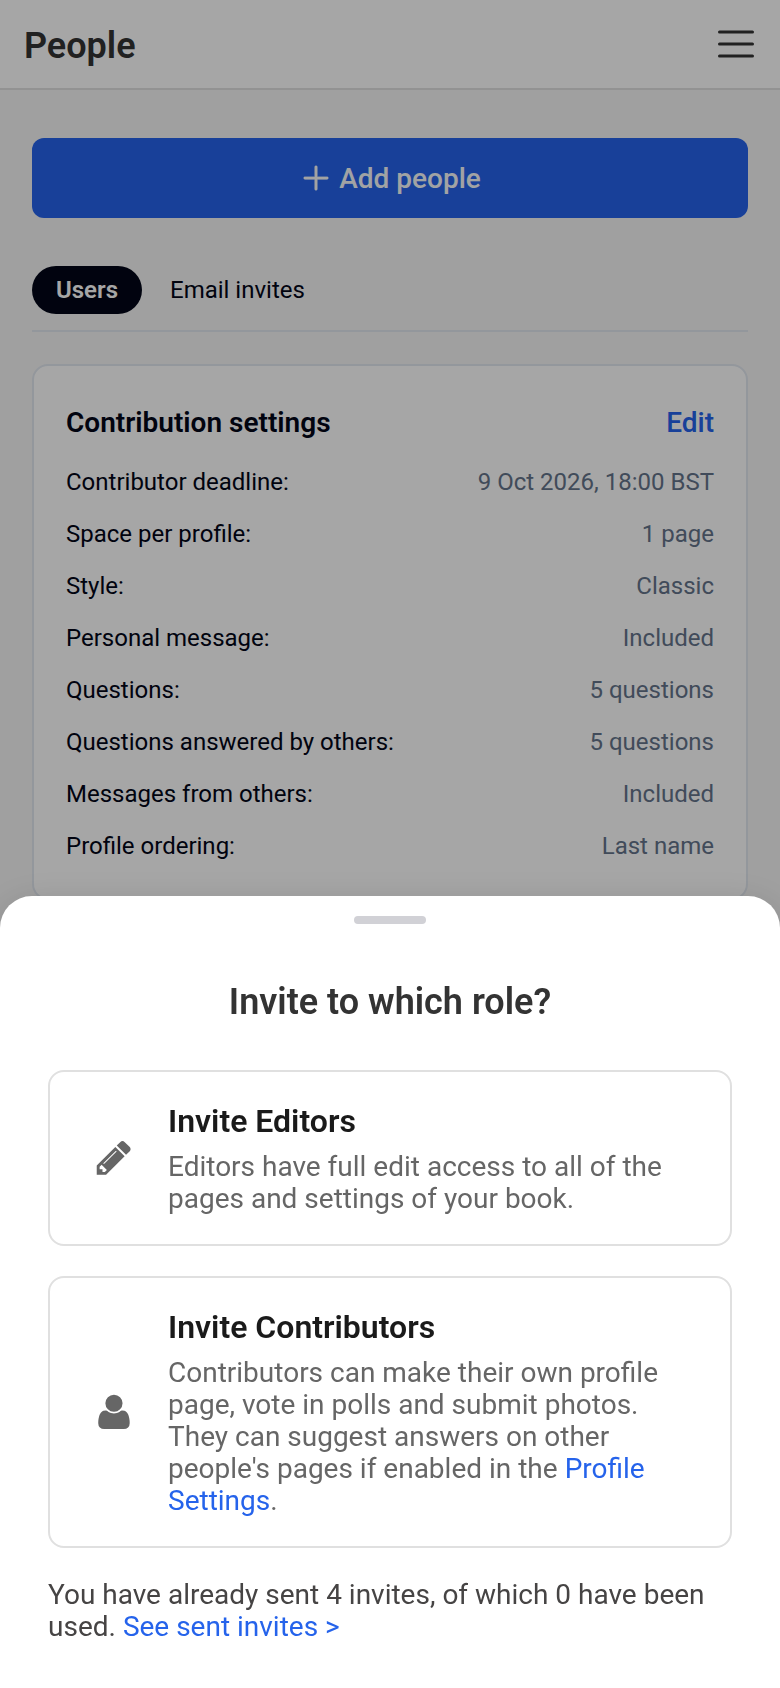
- Invite other editors. Go to People, click Add people and choose Invite Editors.
- Plan your book. You can add up to 26 extra pages on top of everyone's profile pages.
- Invite contributors. Go to People, click Add people and choose Invite Contributors. Each contributor gets their own profile page when they sign up, unless they untick Create a profile page for me in this yearbook.
- Choose your cover design, colour, finish and any custom text.
If your title page won't edit properly, let us know. We can remove it for you, and we can put it back later if you change your mind.
Choosing which emails you receive
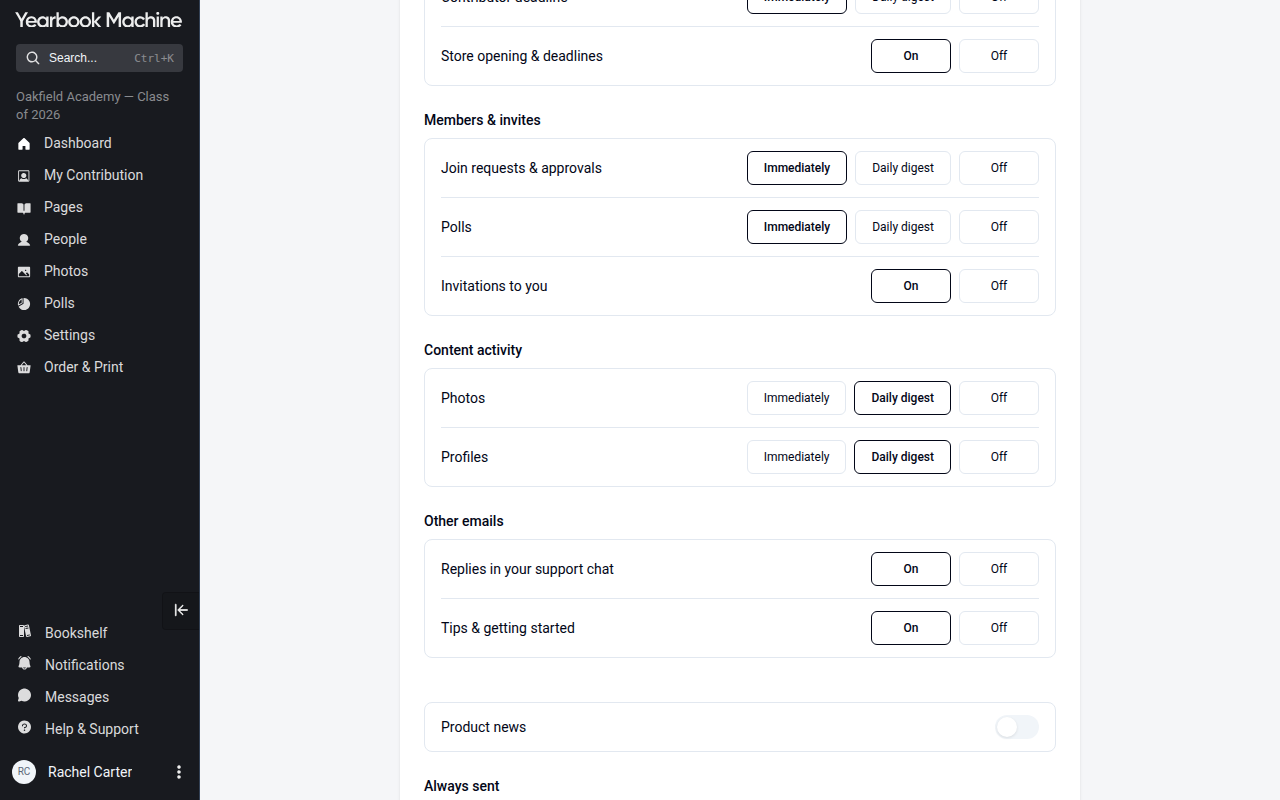
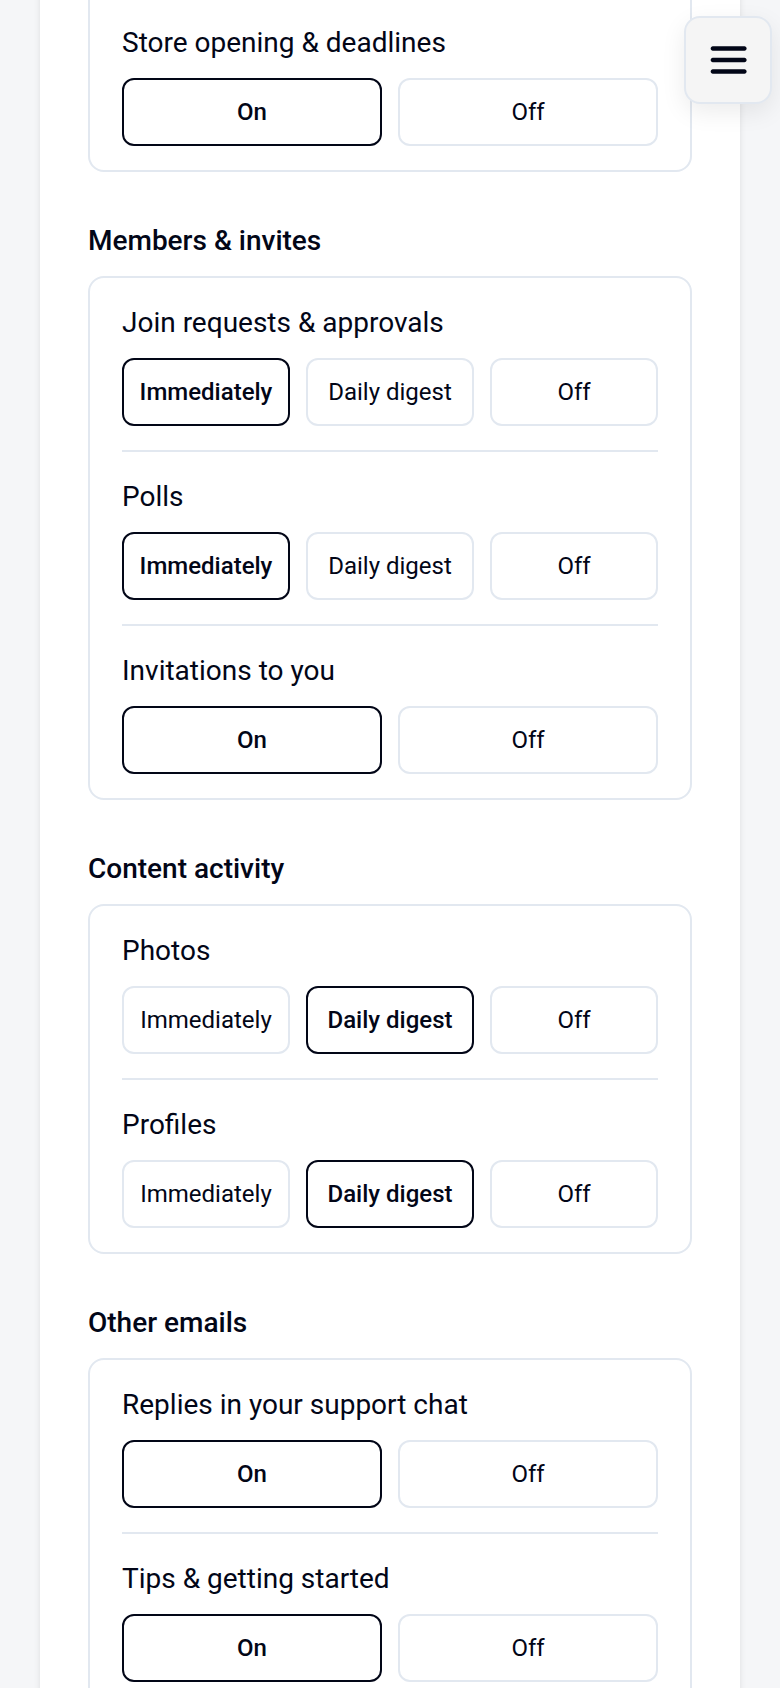
When someone joins through an email invitation, you are told only on the site, never by email. If people ask to join your book and need an editor's approval, you can choose how often we email you about it:
- Click your name at the bottom of the main menu and choose My Account.
- In Emails, find Join requests & approvals under Members & invites.
- Choose Daily digest to get one email a day, or Off to stop these emails. You still see new members in your notifications on the site.
This only changes your own account. If other editors also want to change these emails, they'll each need to change their own settings.
Keeping your page private while you work on it
Who can see pages while the book is being made is decided for the whole book by your book's editors. You can't change it just for your own page.
Editors: go to Settings > Contributor permissions and set Pages to Hidden to keep unfinished pages out of sight. Contributors then see page names but not what is on other pages.
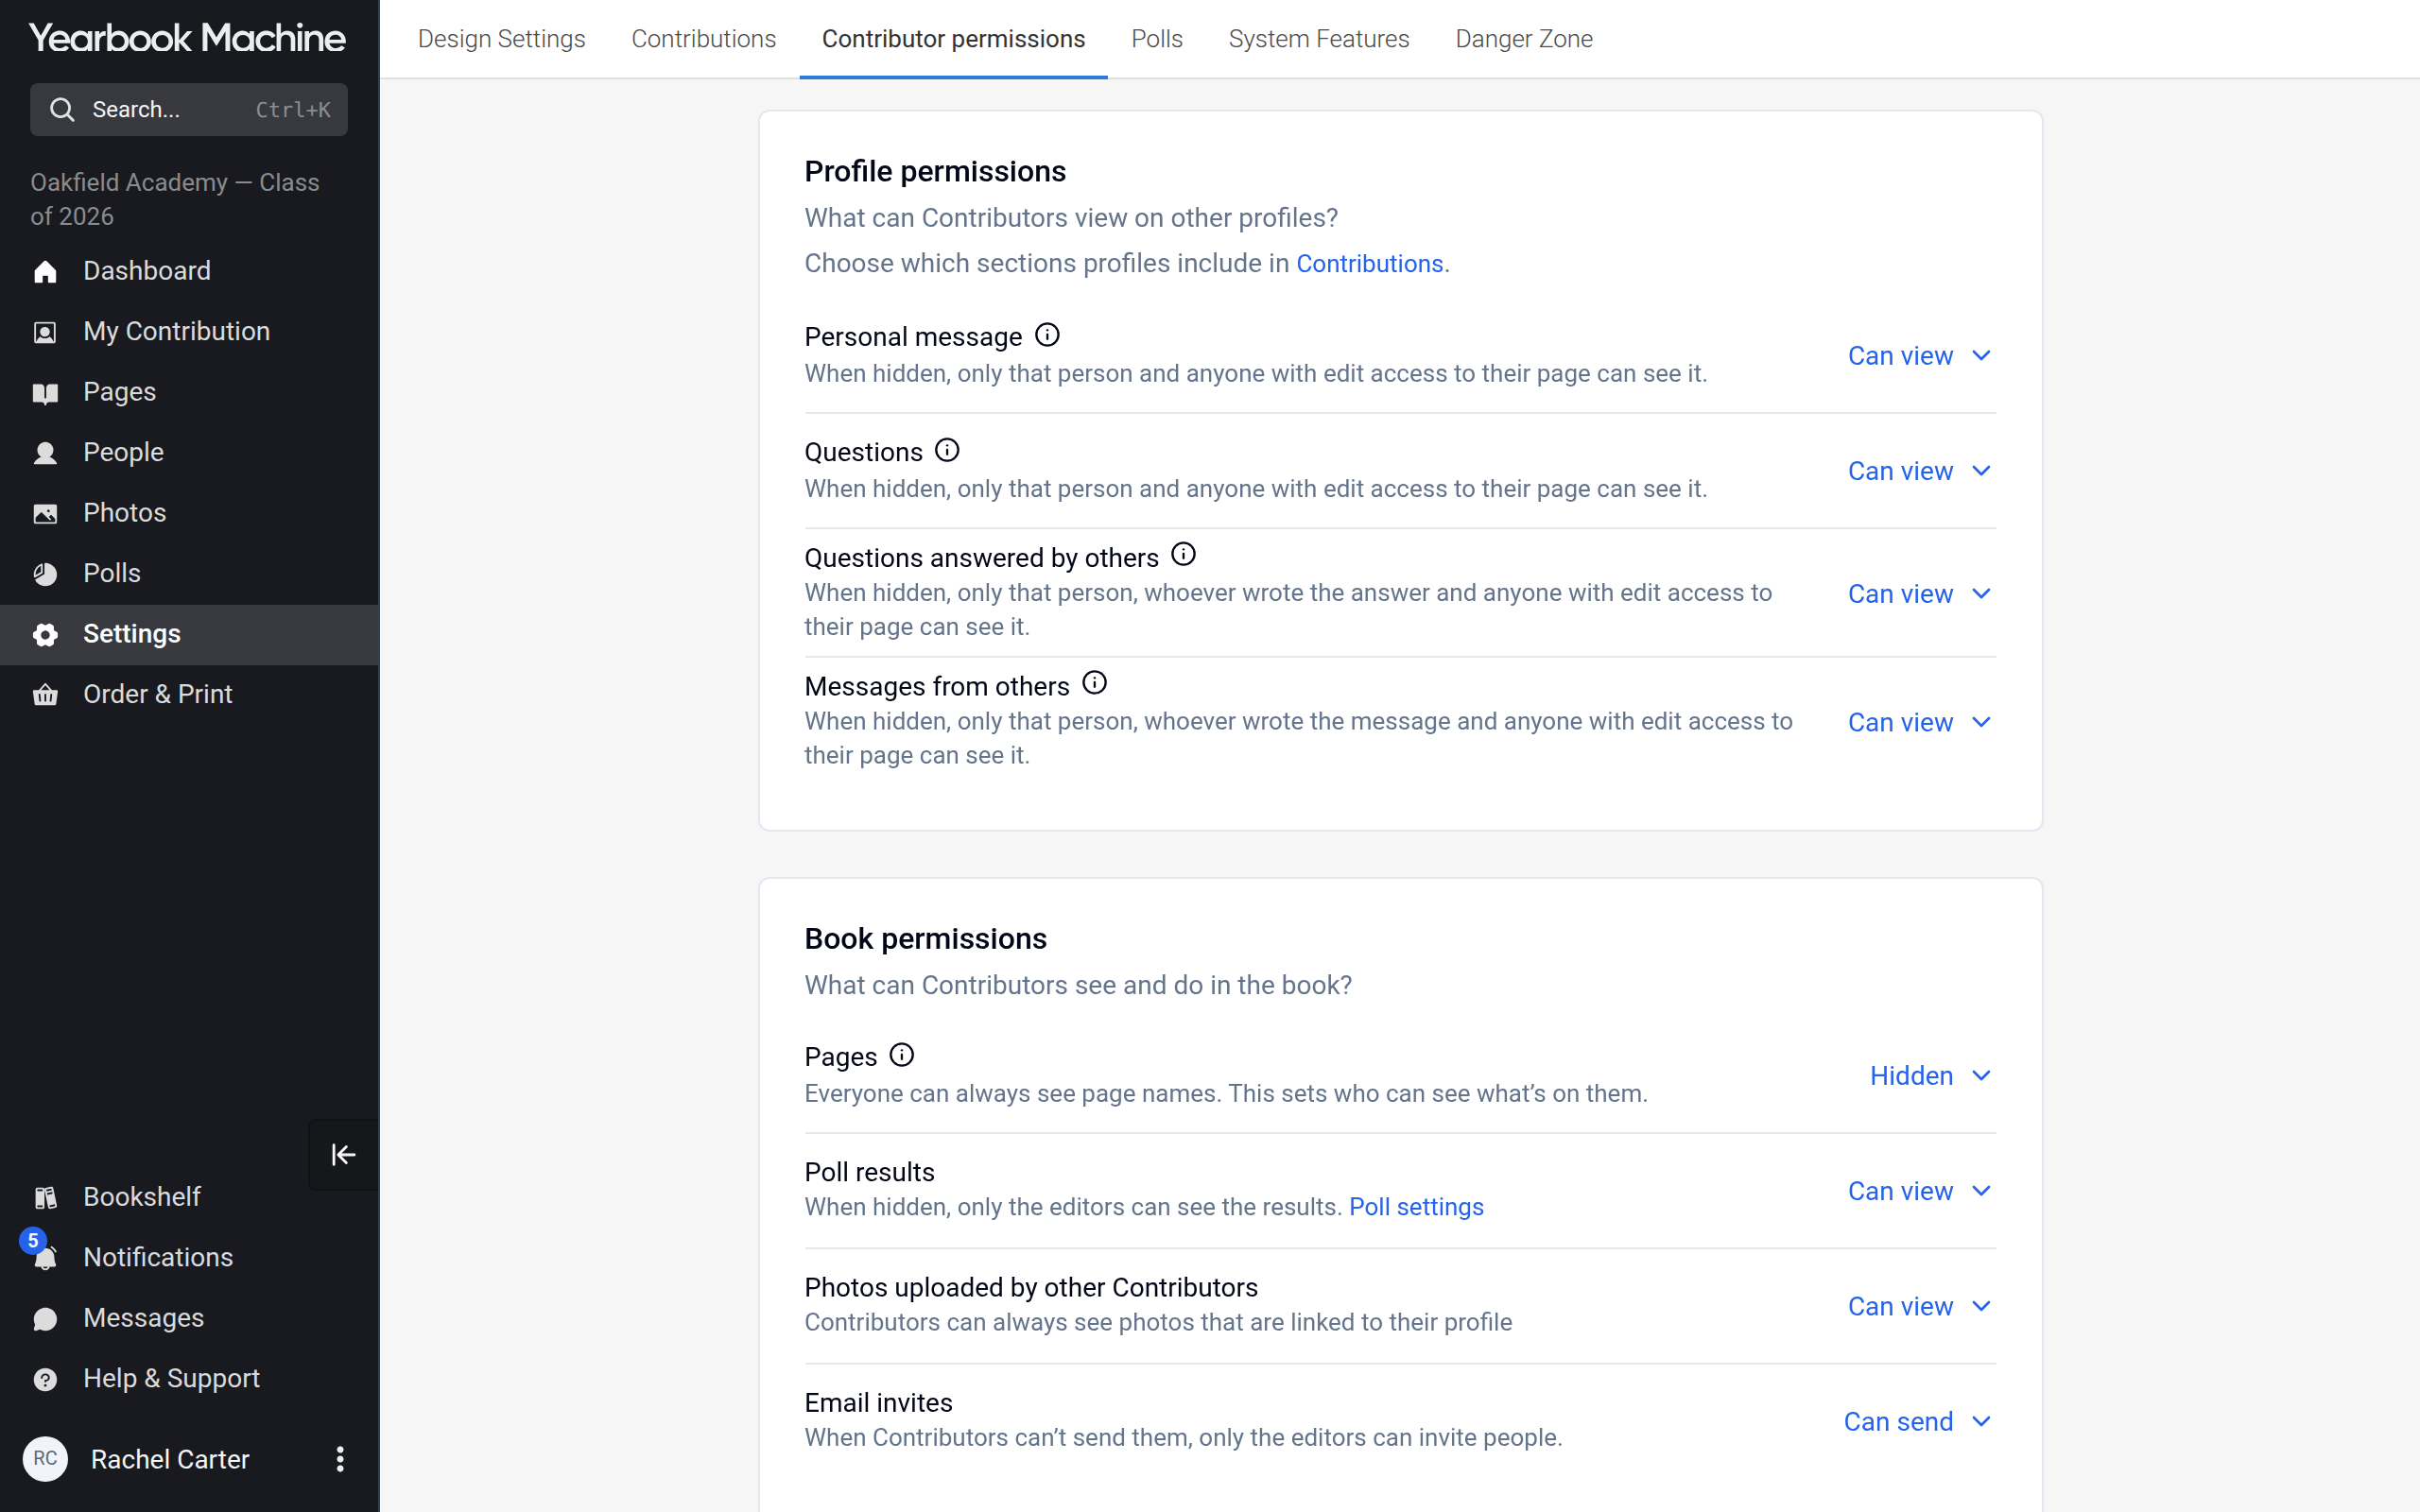
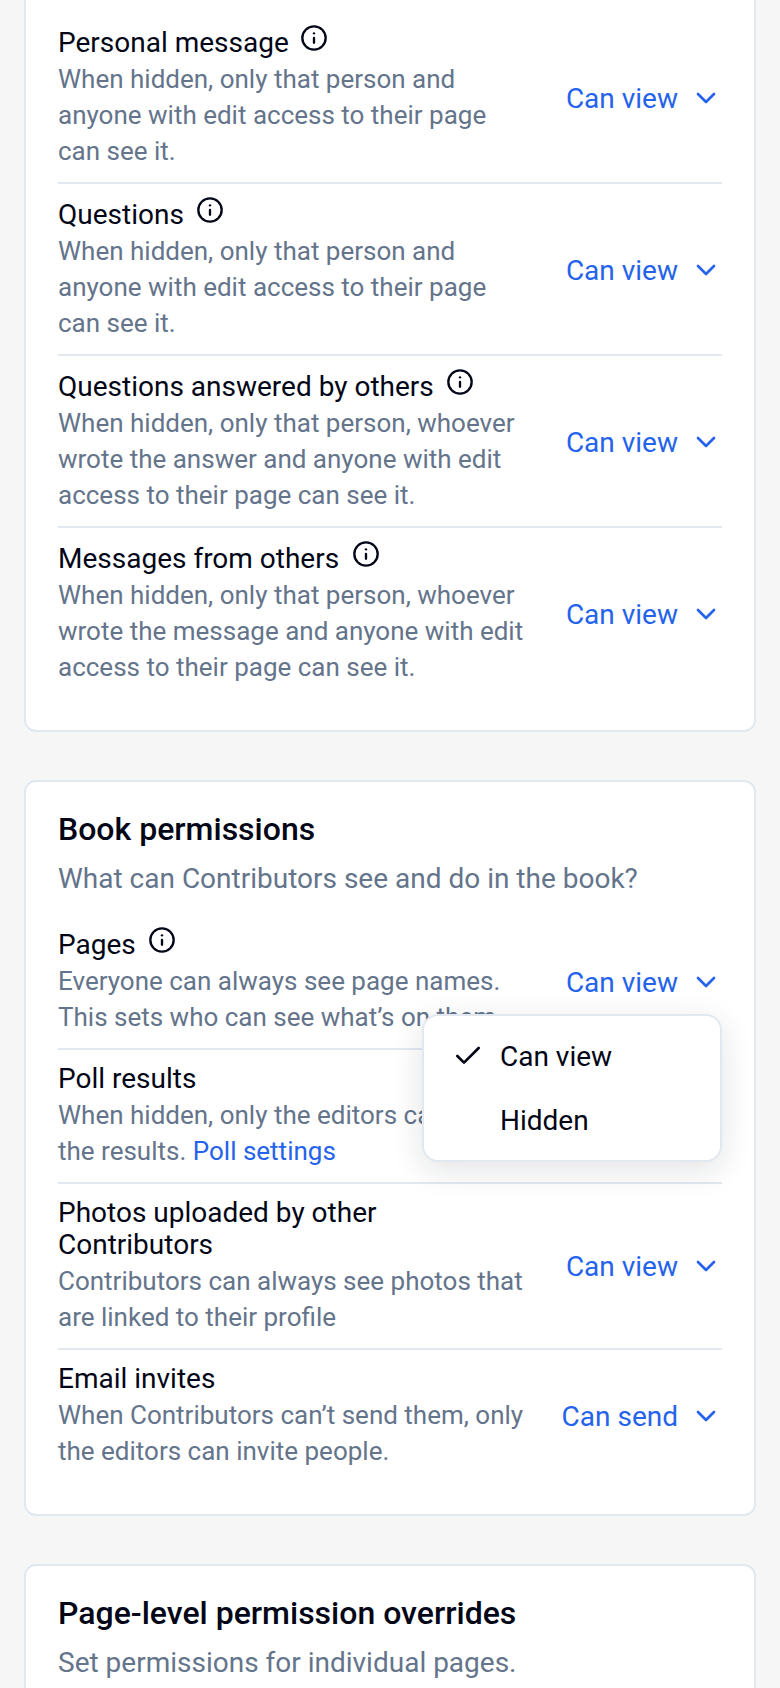
If you're a contributor and would like your unfinished work kept out of sight, ask your book's editors to change this setting.
While you wait, it helps to know what others can already see:
- Your answers in the Questions section stay hidden until they're chosen for print.
- Your personal messages, and messages others write to you, may still show up in print previews.
Checking photos before everyone sees them
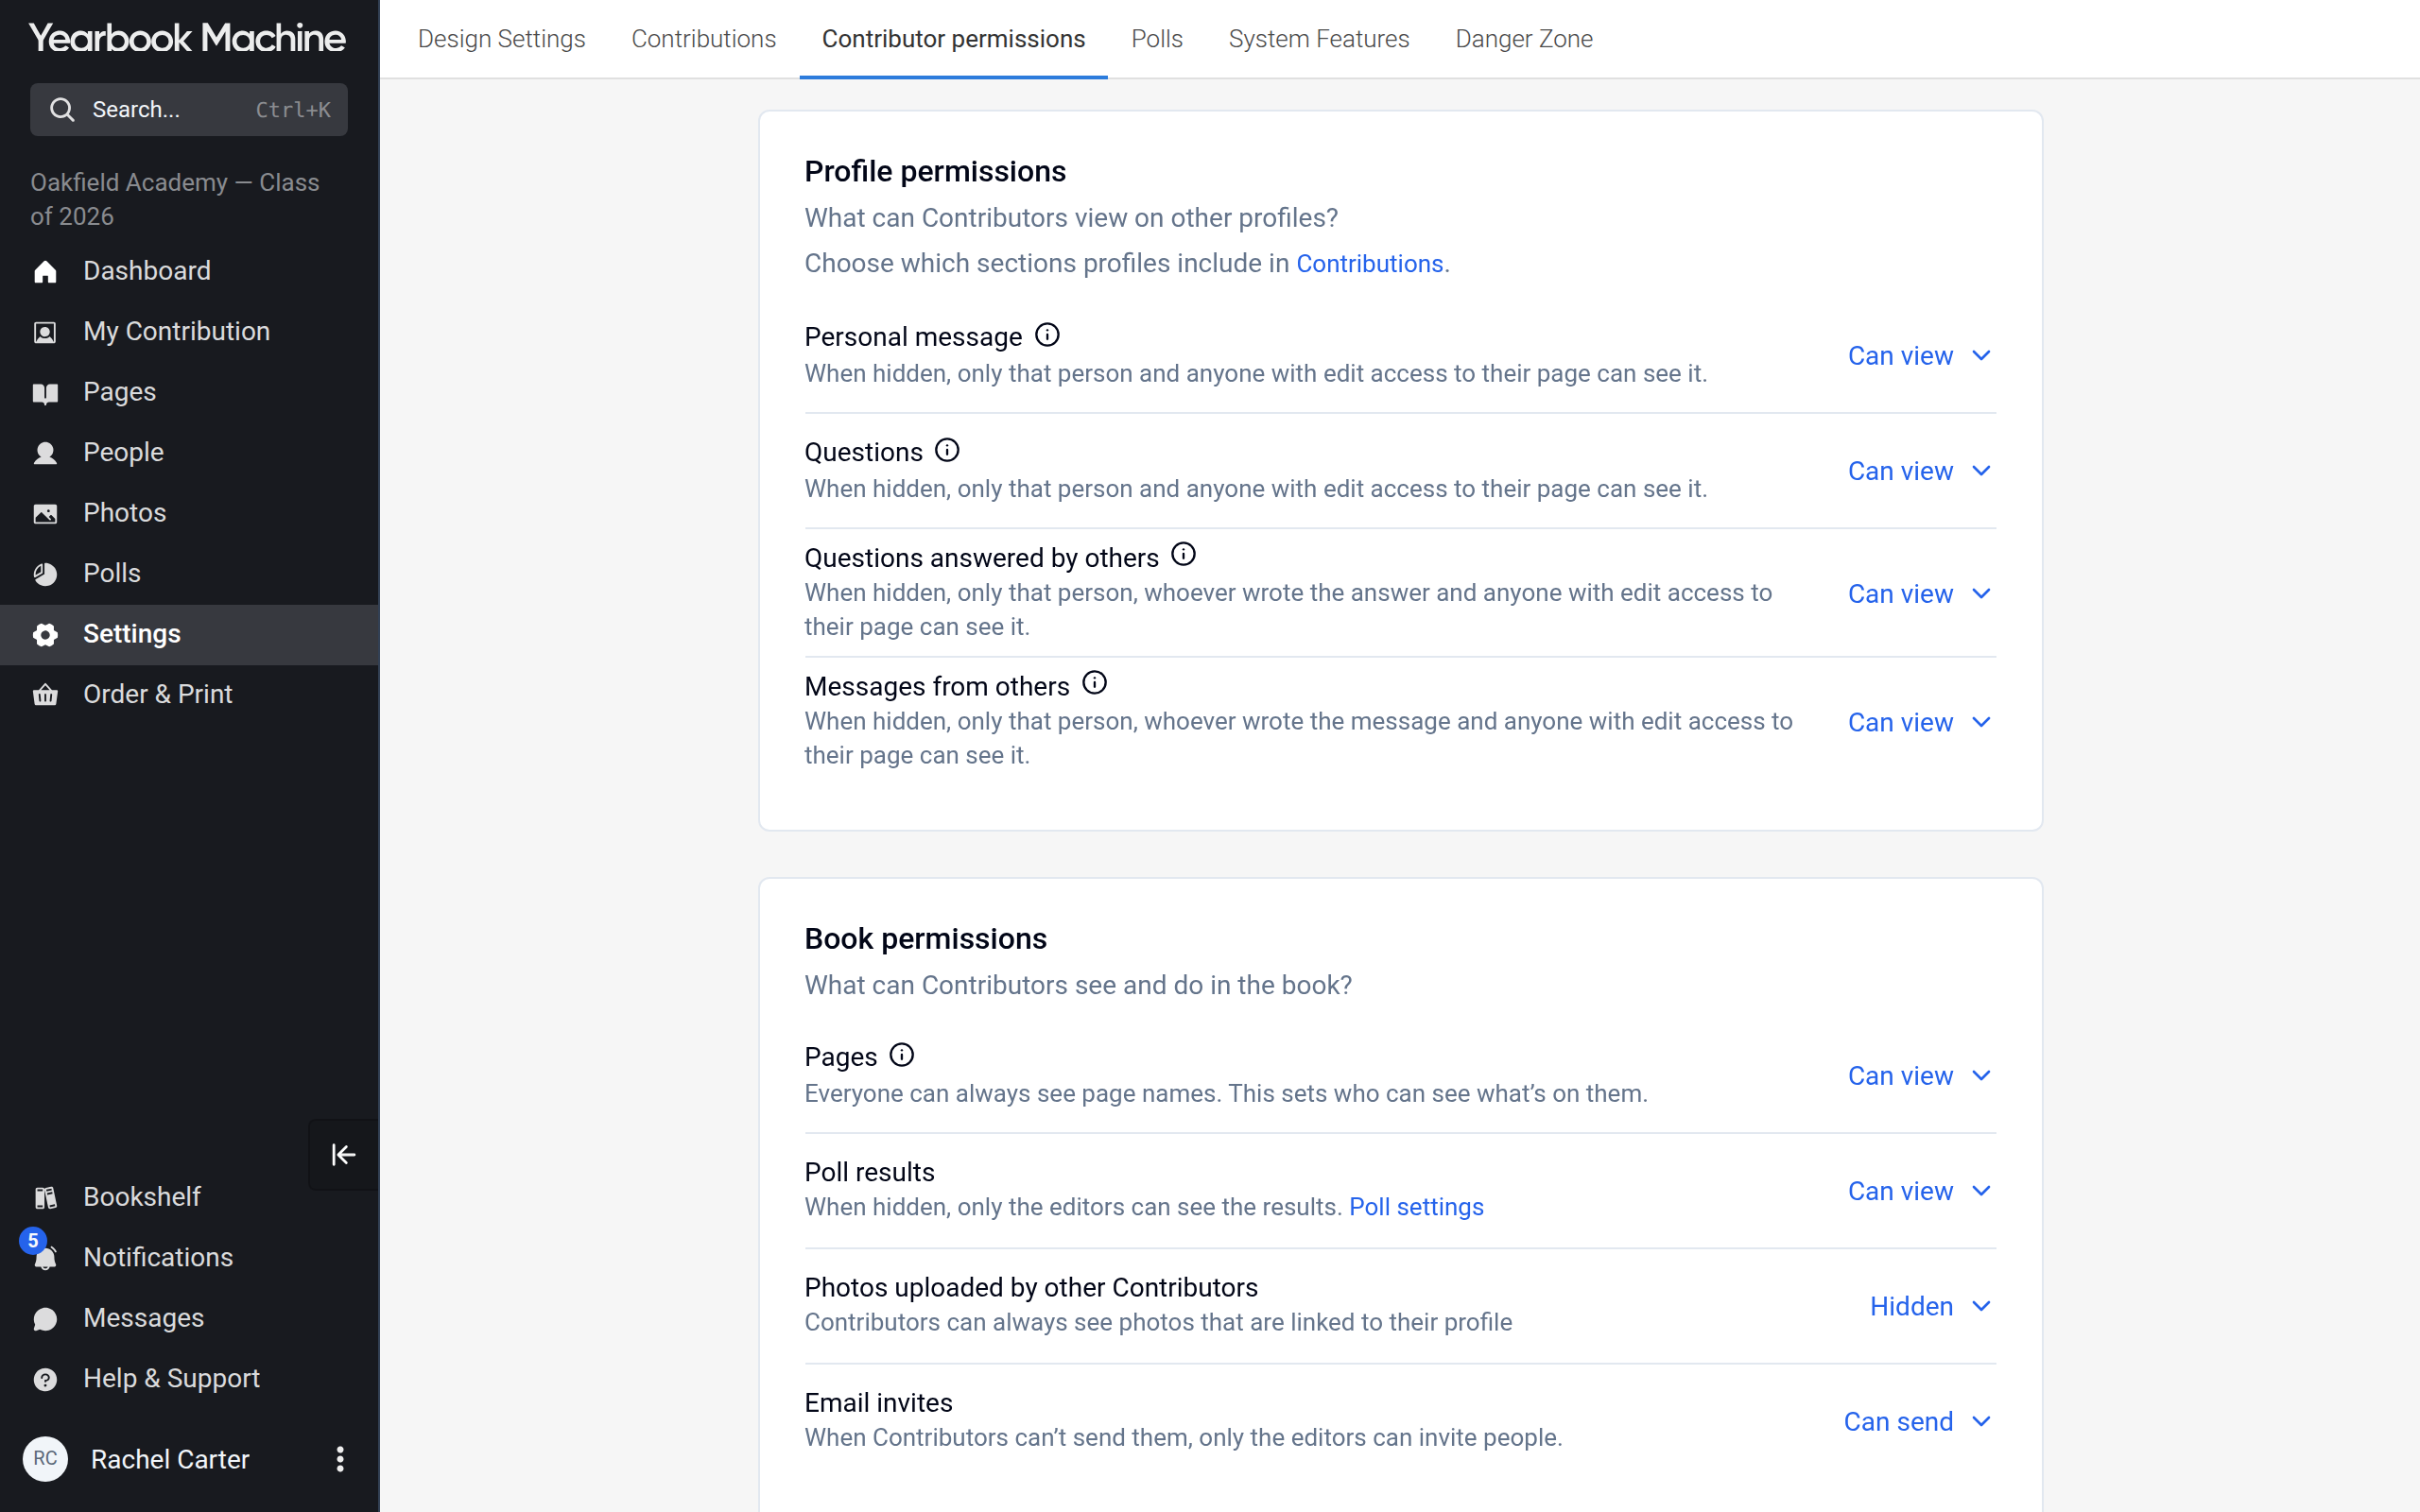
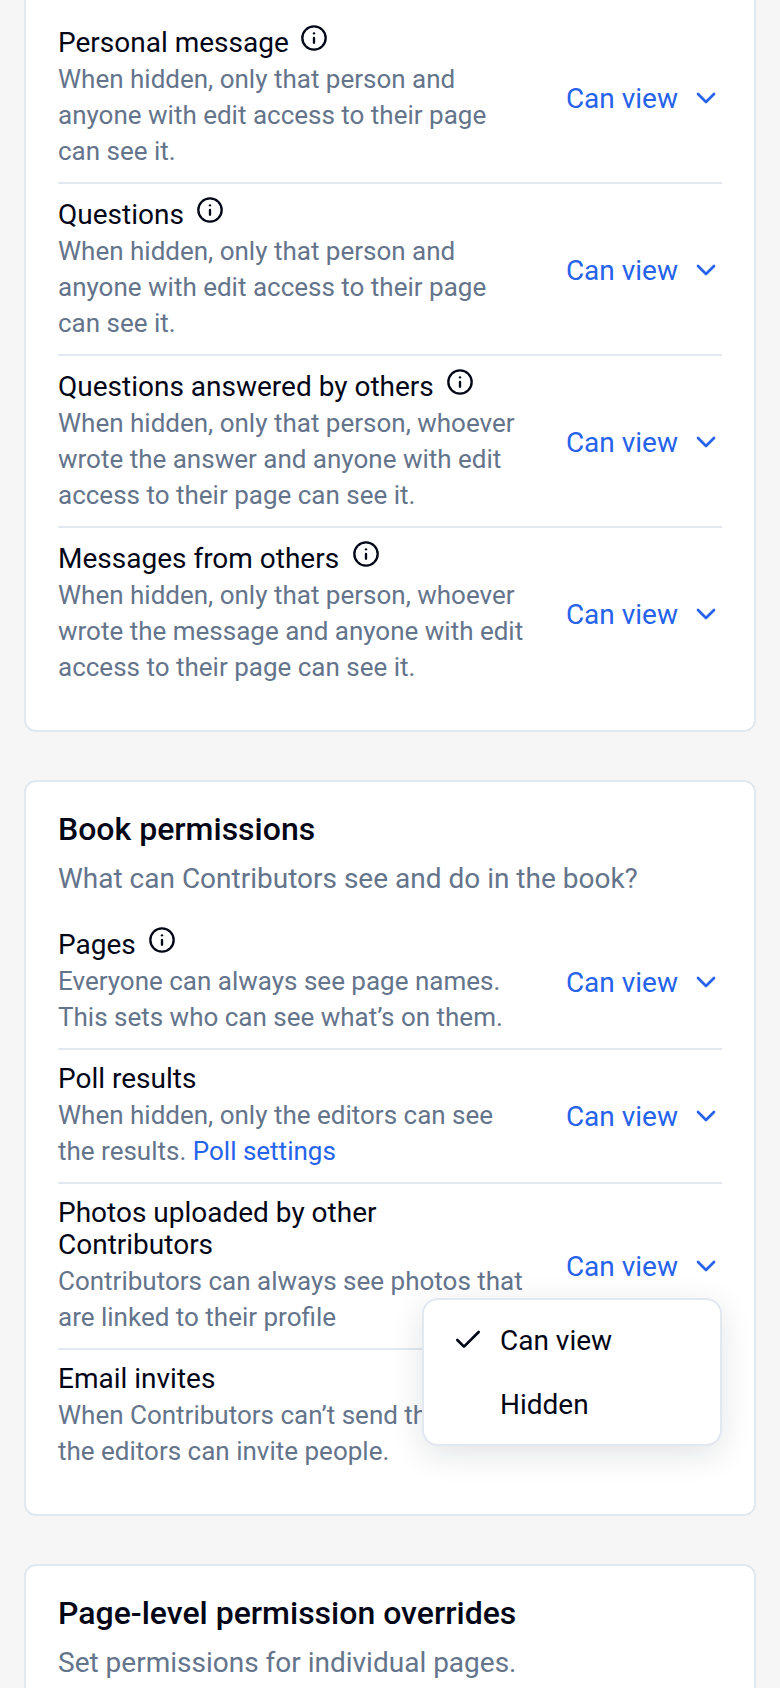
If you're an editor, you might want to look over photos before the rest of your group sees them. Go to Settings > Contributor permissions and set Photos uploaded by other Contributors to Hidden. Contributors then see only photos linked to their own profile, while editors see everything.
Starting a new book, your data and closing your account
- Starting a new year's book: see Bookshelf: Signing in, opening books, notifications and creating a new book.
- A copy of your data: click your name at the bottom of the main menu, choose My Account and use Download your data.
- Closing your account: see How do I delete my account?.
Was this article helpful?
Sorry, that didn't send. Please try again in a little while.
Thanks. That helps us improve this article.
Any other questions?
Email support@yearbook.com and we'll help you out.