In this article:
Choosing the text that will be printed
Line counts
Picking the photos to be printed
Print Preview
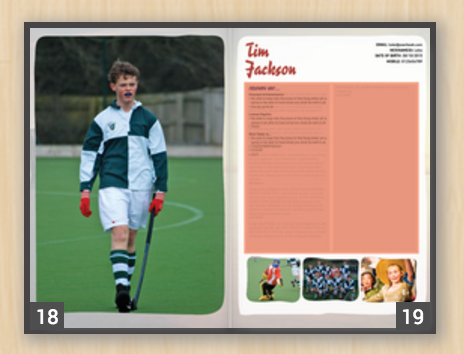
Your Printed Page
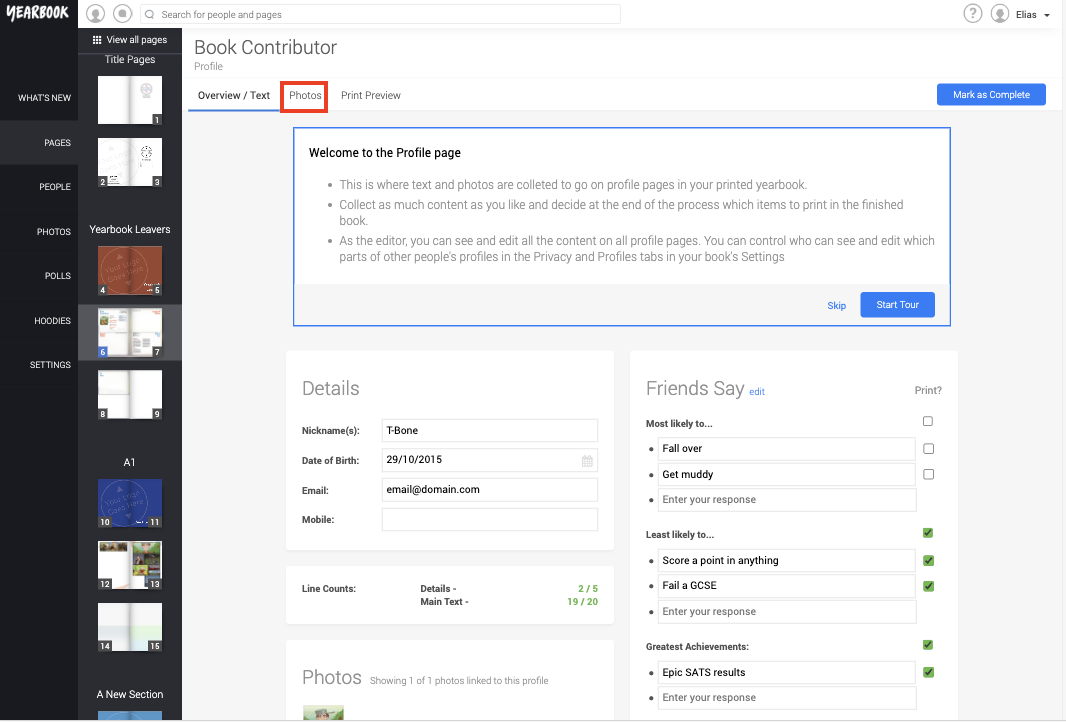
Once you have filled all the content on your online profile page, you’ll need to select what will appear in the printed book.
Choosing the text that will be printed
In order to select what text will be printed from your online profile page, you can use the checkboxes located next to each piece of text:
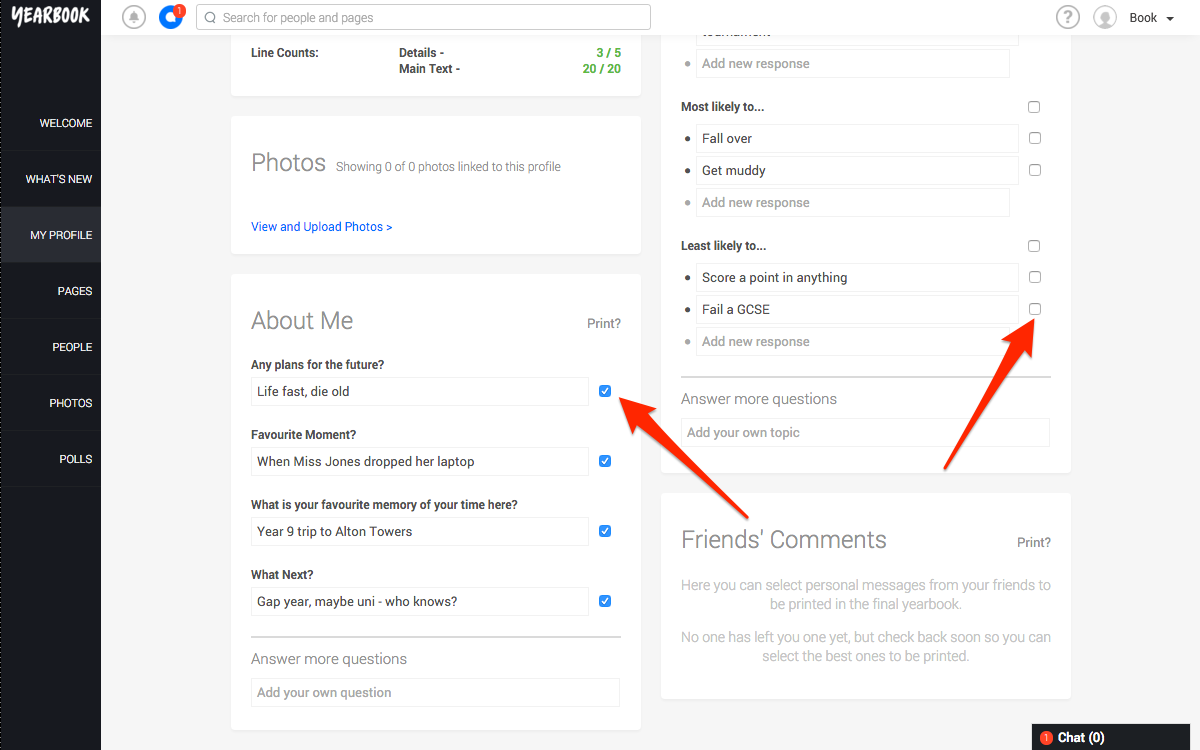
Clicking the box to tick it will mean that that section of text will be printed. Clicking it again will remove the tick, stopping that bit from being printed.
Line counts
Your profile has a set amount of space available for text. The amount that you have used is calculated based on the estimated number of lines your text will occupy.
You can see how much space your content is currently occupying by checking the Line Count section of your profile page:
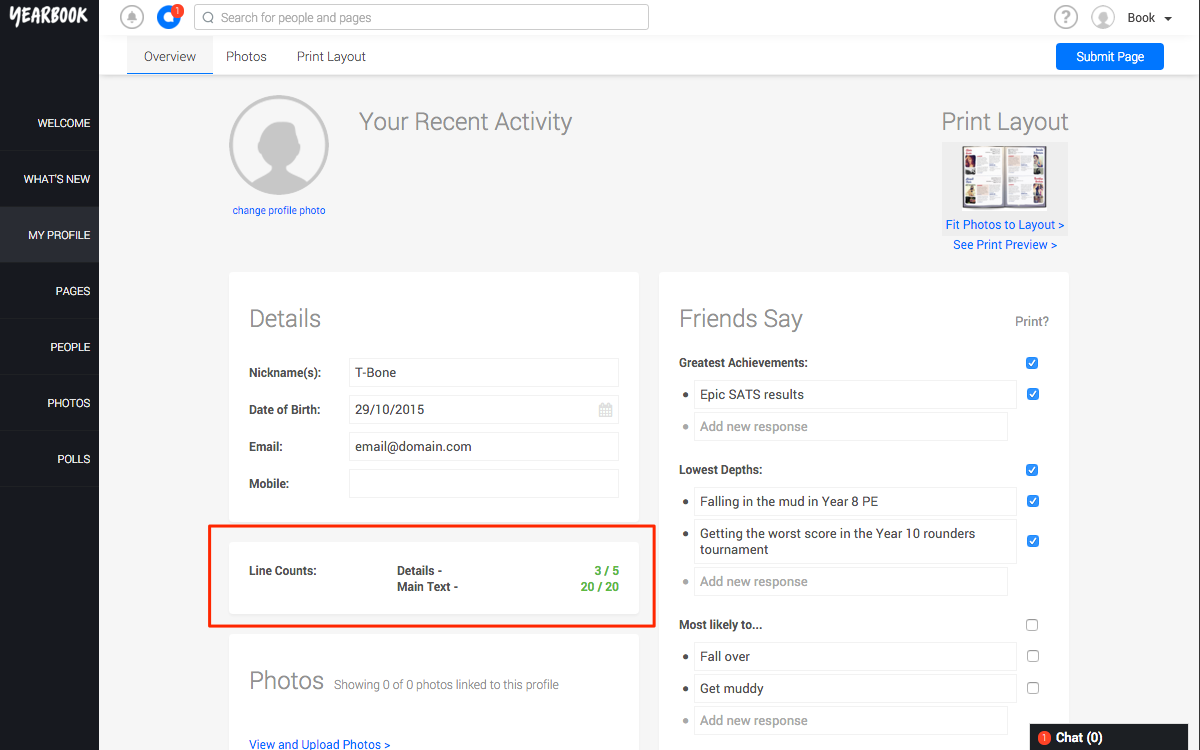
The Details section is separate from the rest of the text, which is why it has its own line in this box.
If you have more text selected for print than can fit onto your printed profile, then a warning message will appear:
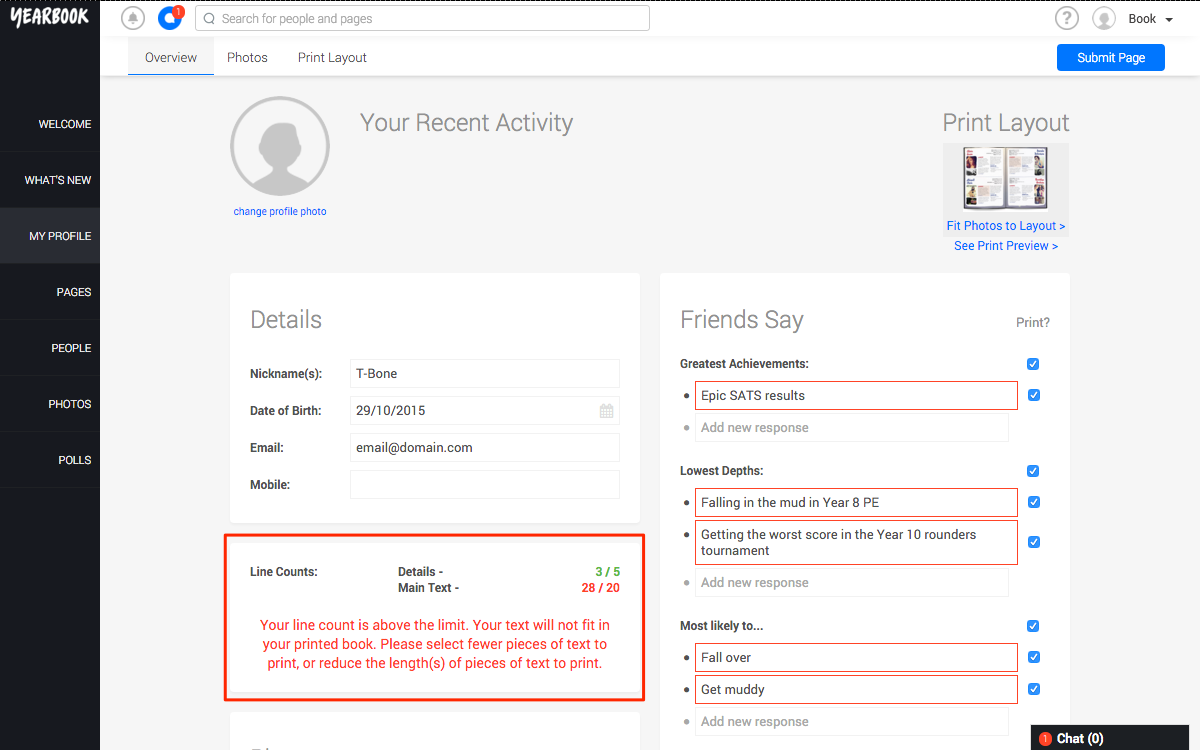
If you see this warning, you should either deselect some lines of text, or edit some of them to make them shorter.
Please note: The Line Counts are only an estimate, and should not be treated as exact . The only way to know for sure if your text fits on your profile page is to look at the print preview of your page. If there is too much text then a big red box will be shown over the effected area, indicating that you must reduce the amount of text on this page. If you don’t see a big red box (and the text on the page indicates that the profile is up to date), then you can be sure that your text will fit and will all be printed, even if the line count is highlighted in red.
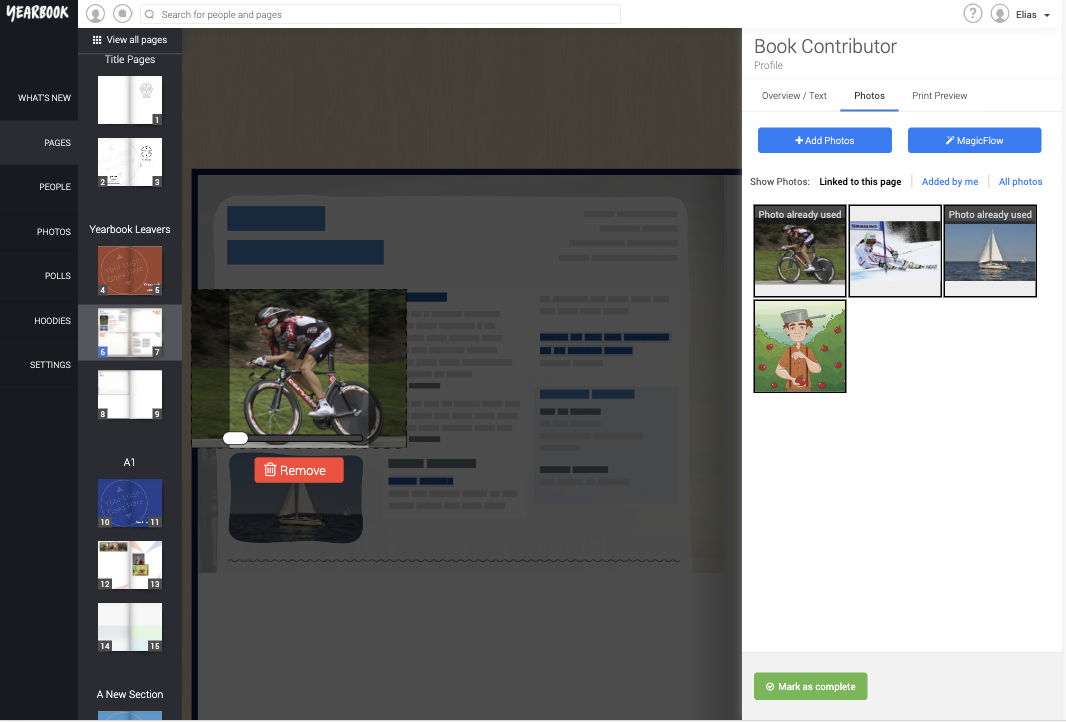
Picking the photos to be printed
Once your text has been sorted, you’ll then need to choose the photos you want to be printed on your profile page.
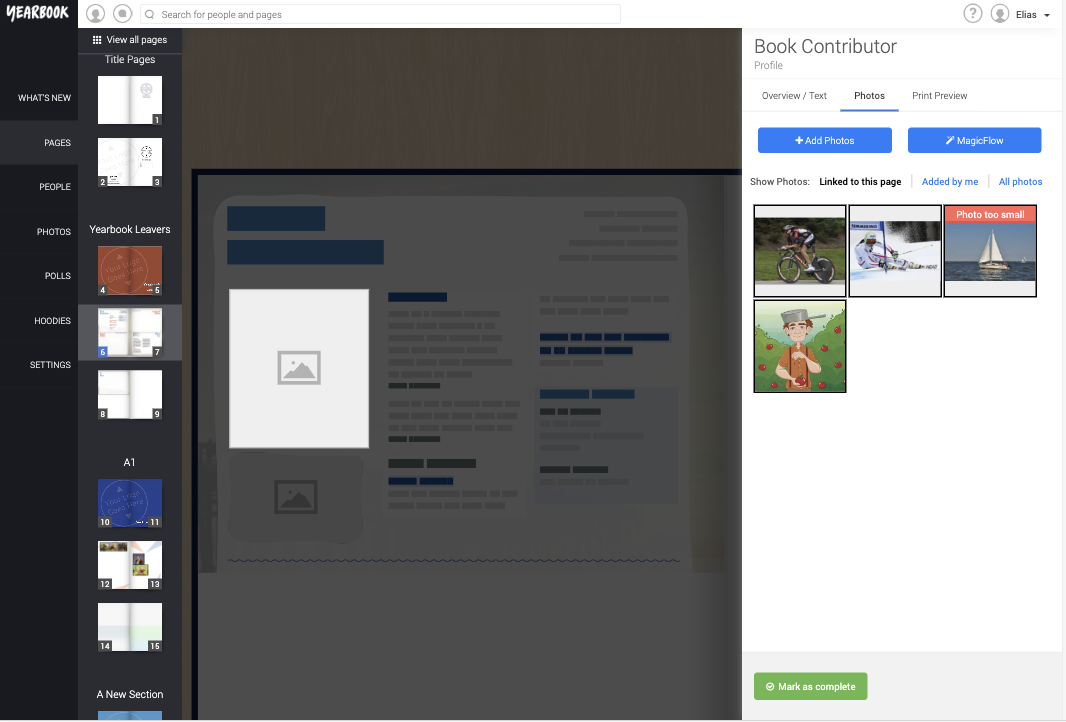
To set the photos that you want, click the Print Layout tab at the top of your profile page, which will take you to our page editor which lets you upload photos, or search all the photos already uploaded, to add them to your profile:
Placing Photos
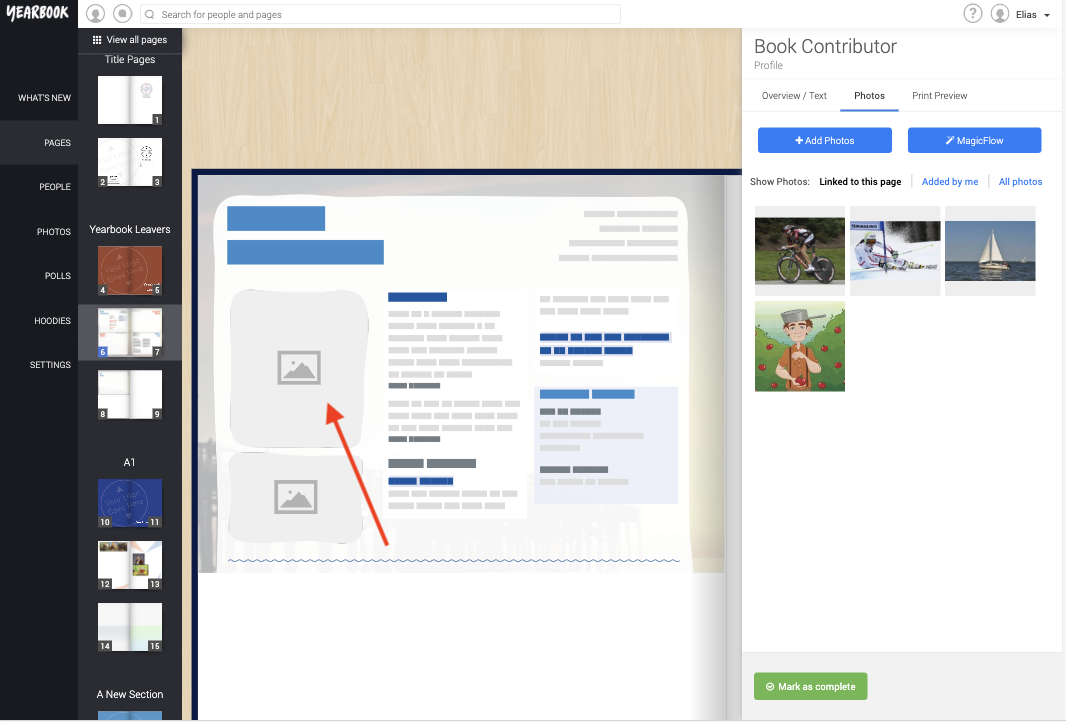
To place a photo, click the slot you want to place it in, and then select a photo from the tray on the right. Alternatively you can simply drag and drop photos from the tray onto each slot.
Framing your profile photos
You can adjust the framing of a photo by clicking on it and and dragging the image, within the slot, to change the position. You can also use the bar at the bottom of the image to increase or reduce the zoom. This way you can get the perfect crop and make sure your face is nicely framed!
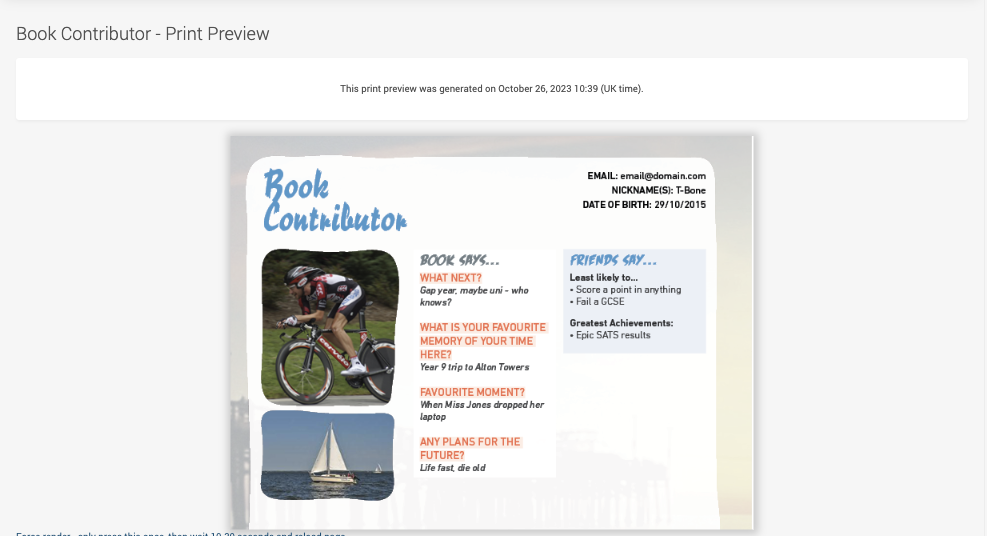
Print Preview
At any time, you can see a preview of what your printed profile will look like, by clicking the Print Preview tab on your profile.
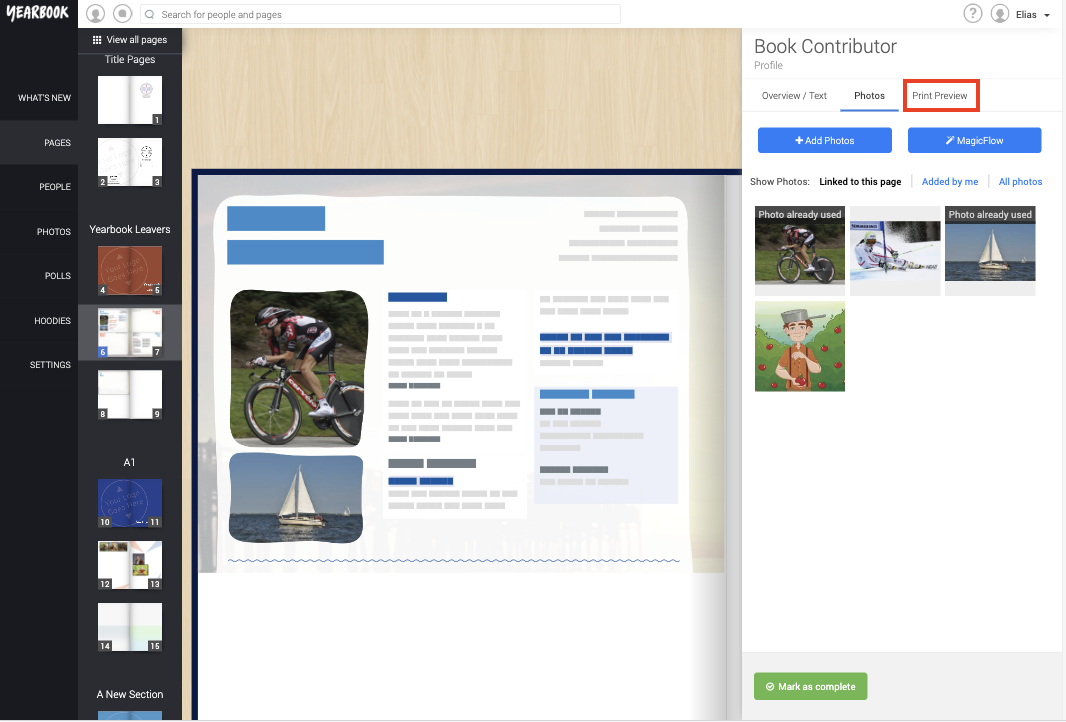
This will show you a preview of exactly how your profile will look when it is printed. You should use this page to determine if you have got the right amount of text included on your profile because the line count is just an estimate, it is not guaranteed to be entirely accurate.